December 27, 2012

Recipe 22 - Homemade Holiday Sparkling Cider

Since it's the holidays, I couldn't let them get away without making some tasty holiday soda. 
Basically I made a 5 gallon batch of my friend's Ginger Cider Lemonade with a little adaptation so I didn't have to use so many lemons.
Once that was all mixed up in a keg, I carbonated it at 30psi between 34 and 40°F.  Pretty simple.  It's really good as is and fits almost any occasion.

Cranberry Syrup:
I wanted some variety with some cranberry syrup to be more festive, so I picked up some cranberries in the produce department.  Cranberries are pretty firm, so to draw the juice out of them I heated them up on the stove with some sugar and water:
2 cups cranberries
1/2 cup sugar
1 cup water

As the berries heat up, they'll burst.  This is completely normal.  Mash them up with a potato masher as you go to break up the pulp and skins.  This pulls the color out of the skins, too to give you a nice natural red for your syrup.  Strain the mash, then squeeze it through a cloth jelly bag to remove the larger skin chunks and the seeds from the tasty part of the syrup.

I bottled everything in champagne bottles (or Martinelli's) to be more portable, but also to mix in the different flavors.  To a 24oz bottle I added 1-2oz of syrup and then topped up with the carbonated cider, capped it, and shook it to mix.  1oz gives enough color and flavor that it's noticeable, but not too tart.  2oz really gives a really nice cranberry bite.

I also added some of my pumpkin pie syrup  to some of the bottles for a spiced holiday cider flavor.  It reminded me a bit of a pleasant mix of apple pie and pumpkin pie, but the pumpkin puree detracted a bit from the clean crisp clarity that I expect out of a sparkling cider.

Sodastream Version

I love the ginger cider lemonade recipe, and it is nice to have 5 gallons of a finished sparkling beverage on tap, but I do recognize that many people may not have that luxury.  Many of the home soda makers warn that you should only carbonate water and add the flavor later.  That may not work well for the above recipe, but a frozen juice concentrate would make an excellent base for a sparkling cider.  I took some of my cranberry syrup and added it along with an inexpensive grape juice concentrate to carbonated water for a clone of Welch's Sparkling Cranberry Red Grape.  We love the Welch's Sparkling Blueberry and Red Grape at our house, so a blueberry syrup and grape juice concentrate blend is on deck for the next round of sparkling goodness.

November 16, 2012

Homemade Soda Holiday Gift Ideas 2012

It's that time of year again.  Halloween is over and Thanksgiving is sneaking up fast.  As of this post, there's only one week until the dreaded Black Friday.  The Holiday shopping season is upon us.
So now you need some gift ideas for that special someone who has taken up a sodamaking hobby.  We can be a hard bunch to shop for, I know.  If you're having some trouble, here are 10 ideas that I have handpicked for anyone who loves homemade soda.

1. The Artisan Soda Workshop by Andrea Lynn

This little book would make a great stocking stuffer.  For anyone who is into natural ingredients and artisan foods, this book is a great companion.  The recipes in it were developed with the Sodastream in mind, so it's a perfect segue from the commercially available sodastream syrups to DIY prowess.  The flavors in here are really inspiring, too.  From Rhubarb Basil and Rosemary Lemonade to Tomato Water and Persimmon-Black Pepper Shrub.  


Fee Brothers has been serving mixologists since 1920 with drink mixes and flavorings.  They have an impressive lineup of syrups for beverages including Watermelon, Sour Apple, Warm Ginger, Grape, Orange, Lemon, Lime, and many more.  


3. iSi Soda Siphon
iSi has been in the soda siphon and cream whipper business for quite some time.  If you want to go vintage, there are glass syphons with mesh from other manufacturers, but iSi offers a brushed aluminum that will hold up to some wear and is more economical, but still has the vintage feel.  Andrew Schloss recommends these in his book as an easy way for quick force carbonated soda.

Bottling in glass bottles is fun.  There's something nostalgic about it.  You can make that experience even more nostalgic with overrun caps.  A plain cap is inexpensive, but lacks character.  This seller on ebay has the best variety of new, unused bottle caps.  You don't have to worry about getting ancient caps that may or may not seal, and you get a great assortment to avoid the mundane.

5. Vintage Soda Crates
If you are bottling in glass bottles, that means that you're storing glass bottles somewhere.  Under the stairs, in the closet, in milk crates, in cardboard boxes.  Vintage soda crates usually run about $25 each depending on where you find them.  This seller on ebay has good feedback and a wide selection.  Check flea markets, craigslist, and antique stores in your area if you want to buy local.  Sometimes garage sales have them for a great price, too.

6. Homebrew Kit
Go old school with a homebrew soda equipment kit from Midwest Supplies.  The process is simple: boil and strain your roots (or easier yet, use an extract), add sugar, pitch the yeast, bottle, and wait.  The process is made easier with a bottling bucket and bottle filler.  

7.Mr. Root Beer or Copernicus Kit.

If you want to go old school, but don't want the big batch kit from Midwest, try an all inclusive kit from Mr. Root Beer or Copernicus.  Kits include everything you need to make a yeast brewed batch of soda.  Pretty much you just add water.  The Mr. Root Beer Kit even includes bottles.


8. Roots and Herbs
Starwest Botanicals is one of the top finds for bulk herbs and spices.  They have a wide selection that includes common root beer and cola ingredients such as sarsaparilla root, sassafras root bark, burdock root, dandelion root, star anise, vanilla beans, and many more.  When using herbs and roots, it's always advisable that these were originally used for medicinal purposes, so it's important to know what these herbs were used for to avoid any unwanted side effects.

9. Fix the Pumps by Darcy O'Neil
From mixologist Darcy O'Neil, author of the Art of Drink blog, Fix the Pumps tells the history of the soda fountain and includes old time formulations using their original ingredients.  A must have history lesson for any soda maker.

Gnome specializes in old fashioned flavors and comes highly recommended.  Available in Crystal Clear Vanilla Cream Soda, Dark Vanilla Cream Soda, Draft Style Root Beer, Autumn Red Birch Beer, and Spicy Ginger Beer.  Add your favorite sweetener to taste and carbonate naturally or under pressure.  Their home page has instructions and sugar equivalents, but these must be purchased through other retailers such as CHI, Midwest, Northern Brewer and other homebrew supply stores.


November 9, 2012

Recipe 21 - Paris Lemon Mint Cooler Soda

This is a recipe that my sister asked me to make up for her wedding.  The idea came from something she had on her trip to Europe.  I think it was basically a sprig of mint leaves and a lemon wedge in ice water, but as I was putting this together for her reception, I thought it would be better sweetened and carbonated.  It worked out very well and I received many compliments on it.  It was such a whirlwind that I personally didn’t get any great pictures of it, but it was a great presentation.  The pictures here are courtesy of their photographer Katie.  The syrup I made was mixed into carafes with club soda.  There was a sprig of mint leaves in some, and raspberries in some others.  The raspberries added a touch of color and some great flavor that mixed in very well with the lemon and the mint. 


I also recently made this and bottled it for a cookout with friends and my kids loved it.  I thought the mint made it more of a sophisticated flavor, but I apparently couldn’t keep this around long enough for many adults to try it.  Imagine that.

1/2 cup Lemon Juice
1/2 tsp Mint Extract
1 lb sugar


This recipe is incredibly simple, but is also incredibly tasty.  Prepare your basic sugar syrup, many longtime readers know I prefer to invert mine.  If you plan on bottling this beverage to store for a while, add the lemon juice when the mixture is still hot to kill off any wild yeasts that might be in the juice.  You don’t want to boil the lemon juice with the sugar, though, or else you will destroy most of the citric acid.  If you’re planning on keeping your final beverage refrigerated or consuming this rather quickly, you can wait for the sugar to cool before adding the juice.  You definitely want to wait for it to cool before adding the mint flavor, the menthol that give mint it’s characteristic flavor boils off quickly, so you’ll end up losing some of the flavor if your sugar is too hot.  (And if you do happen to add it while your sugar is too hot, be sure your face isn’t right over the pot, menthol burns your eyes.)

This is enough syrup for 1 gallon of finished beverage, though the nature of this beverage also lends itself well to more subtle flavors.  So depending on your tastes, you may end up with enough syrup for 1.5-2 gallons finished beverage if you like your flavors and sweetness on this one a little more subdued.

November 1, 2012

Happy Halloween!

Tony Stark, the Homemade Soda Expert.
Happy Halloween everyone!  I've decided that I would go ahead and break my own unwritten rule of remaining anonymous and faceless here on my blog.  I needed to show off something that I built in a cave with a box of scraps.  Of course by cave, I mean on my living room coffee table, and by box of scraps, I mean a box and some other stuff I had lying around but not necessarily in the box.  But because Trick-or-Treating was postponed in our neighborhood due to weather, I at least needed to awe someone with my glowing chest piece.

I promise I do have a head above my eyes, and I'm not sure how that pumpkin photobombed my picture.  Actually, this was a photo for a contest.  Which is why I'm here today.  Midwest Supplies is hosting their annual Boo Brew giveaway, and who couldn't use some extra supplies to build up their recipe repertoire?  If you like my blog, and you like what I do here, and you would like to see more.  You can do your part to make this blog better by voting for my picture on their Facebook promotion Here.  Voting is open until 11/7.

Thanks for your support!  Now go make some soda!

October 20, 2012

Recipe 20 - Pumpkin Pie Syrup for Soda and Everything Else

Another write-up for my longtime friends over at Everyday Art
I want to offer a special thank you to them for letting me be a part of their Pumpkinpalooza!


Let me just say that fall is a particularly favorite time of year for me.  October is a good month.  It's time for harvest celebrations, apple cider with glazed donuts, Halloween, and of course all things pumpkin.  Sometimes I wish that everything could taste like pumpkin pie.  Jones Soda did place doubts into my mind with their Pumpkin Pie soda in one of their holiday packs (really Jones, you could have tried harder).  At the first taste of their not so pumpkin pie soda, I knew there had to be a better way.  After many failures in years past to produce a suitable pumpkin pie soda, (it turns out a little pumpkin goes a long way) this is actually a tasty recipe that by far makes all those failures worth the effort.

You'll Need:
1 1/4 cup water
1 cup sugar
1/4 tsp cloves
1/4 tsp ginger
1/2 tsp cinnamon
1/2 tsp nutmeg
2-3 Tbsp Pumpkin Puree (fresh or from the can)

1. In a small sauce pan, combine the 1 cup of the water and all four spices.
2. Cover and bring to a simmer for about 5 min.
3. Allow to cool, then strain through a fine mesh sieve or suitable strainer to remove the ground spice.  You should have plenty of good spice flavor infused into the water.
4. Top up your spice infused water to 1 cup (I used the remaining 1/4 cup) and combine in the saucepan (rinsed of all spice granules) with the sugar.
5. Heat to dissolve the sugar, this may take it to a simmer again.
6. Remove from heat and add pumpkin puree.
7. Allow to cool and add to soda, oatmeal, pancakes, waffles, french toast, hot chocolate, cream cheese, egg nog, or whatever.

For soda:
To 2 Tbsp syrup, add 8-10 oz of Club Soda or to taste.  Carefully stir and enjoy.  With this recipe, there will be pulp from the pumpkin, so a finished soda doesn't bottle and store well.  I've tried to keep the particulates at a reasonable level by filtering out the spice.  You can leave the spice unfiltered if you wish for using this recipe in things like cream cheese, ice cream, pancakes, hot chocolate, egg nog or anything where you might expect spice to linger.  For a thinner body beverage like soda, it's best to leave the spice granules out, but keep the flavor in.

This is a great Soda Stream recipe because it lends itself well to smaller batches: the pulp settles out if it sits, and if your house is like mine, not everyone likes pumpkin pie flavor, particularly in a soda.  The syrup keeps for up to three weeks in the refrigerator, but it's good enough that it probably won't be around that long.

October 17, 2012

Recipe 19 - Lemon Water Soda (Homemade Sprite)

When I was a kid, I never believed the Sprite commercials when they said that it was supposed to be a lemon-lime flavor.  They did almost have me fooled into thinking that there was such thing as a "lymon", though.
I always thought that Sprite, 7-up, and other lemon-lime clones were sort of flavorless.  They were sweet, they were clean, they were refreshing, but they weren't distinctly lemon or lime.  Then one day as a child I tasted club soda and it brought everything into context.

Snap to 25 years later, and here's my take on the clear citrus beverage.  Sweetened, carbonated, lemon-water.  I do enjoy a lemon in my water from time to time, and I thought it would be a good match to other green-bottled clear citrus sodas.  It is perhaps the simplest soda next to plain club soda (carbonated water).
You'll Need:

1 Lemon
1 lb sugar
1 tsp Citric Acid , or additional 2 tbsp lemon juice
1 gallon (4 L) carbonated water

The great thing about this is that you can add as much syrup to your carbonated water or as little as you want and it will always taste great (well, within reason).  What I've outlined here is a pretty decent match to the commercial versions, but without the lime.

First, zest the lemon and steep the zest in about 1 cup of water.  You should get a pretty good yellow color, with it, too.  Unfortunately, this doesn't necessarily show up in the finished product.

Next, Strain out your lemon zest/peel, and add your sugar directly to the water that you've used to steep the lemon in.  I normally invert my sugar to get more sweetness out of it, but this comes out nicely without the inversion.  Using pure cane sugar comes out a little clearer, and a little less syrupy, but you do end up with the same amount of calories for less sweetness for those making their own soda for health reasons.  You can obviously always use less sugar for a less sweet drink, also.

To top it off, you'll need to add some tartness.  Again, you can add as much or as little as you'd like depending on your tastes.   For a crisp, clean drink, Citric Acid can be found online or at some health food or specialty food stores.  If you prefer, you can use Lemon or Lime juice, as they are great sources for citric acid, but you will need to add more, and they will add more lemon/lime flavor and some cloudiness.

Add this syrup to your carbonated water and there you have it.  This makes syrup for about 1 gallon of finished beverage depending on how sweet or lemony you want to end up with.

October 1, 2012

Recipe 18 - Chocolate Cream Soda

It dawned on me the other day as I was going through my stats that I posted 13 recipes last year.  So far this year I have posted a total of four, three of which were listed under "quick-kegging recipes" and were abbreviated versions of previous posts.  That makes me feel like a slacker.  Granted, there's been a lot going on in my life in the past few months, but there's no excuse for not getting those recipes out. 
I've been making soda, there's no doubt about that.  I just haven't been chronicling it well.

I had mentioned in my earlier chocolate soda recipe that I didn't think it was finished.  Though, I didn't fully realize my goals that I set out to achieve when I first attempted chocolate soda, (not from extracts, doesn't taste like a tootsie roll) I have come up with a bit of a compromise.  The secrets to this recipe are the cocoa nibs and the imitation chocolate flavoring.  Cocoa nibs because they can be steeped for a natural flavor and they add a little complexity to the overall flavor without being cocoa powder to settle out or clog filters, and chocolate extract because it's easy, boosts the flavor, and provides a little coloring as well.  Watkins is the only readily available chocolate flavoring that I've seen, the link below is from Amazon, if you can't find it at your local Walmart.

Unfortunately, I didn't quite meet my previous goals: the recipe does contain an artificial extract (not that I really have anything against artificial flavors, but because it makes me feel like a bit of a cheaty-face), and if you're not careful, it ends up tasting fake like a tootsie-roll. 


-1 lb sugar (inverted)
-1tsp cocoa nibs
Steeped Cocoa Nibs
-1tbsp Watkins Imitation Chocolate Flavor (also available at Walmart)
-1 1/2 tbsp Vanilla Extract

Steep the cocoa nibs in about a cup of water.  You can steep more, and use less artificial extract, but that ends up being kind of pricey.  I have wondered what would happen if you ran these through a coffee maker.  I don't own one, so I haven't had the chance to try it.  Fair warning, it doesn't look all that pretty:

Filter out the nibs, then add your inverted sugar syrup and your extracts.  BAM! Chocolate soda syrup for use with 1 gallon of carbonated water.  This would be a great Sodastream recipe, or you may get some extra flavor out of the traditional method of fermenting this with champagne yeast.  I think that would be worth a try, but leave the cocoa nibs in to pull out more flavor.

Easy Bottle Sealing Wax

I put this tutorial together for my crafty friends over at Everyday Art.  They've got some good things going on over there.

For Christmas last year, I put these vintage looking bottles of homemade soda together to give as gifts.  They don't necessarily have to have a Christmas theme to them.  This is not necessarily an original idea, either.  Homebrewers have done this for a while, but I thought my version looked pretty classy so I thought I would share.  The labels were just laser printed on normal paper, the ribbon was just basic ribbon from a craft store, and the sealing wax is actually a blend of hot glue and crayons. 

Sure, you could just buy some bottle sealing wax at a wine supply shop, but if you have kids, there seems to be an endless supply of random crayon fragments collecting in Ziploc bags somewhere.  Do you know what that means?  That means you can make sealing wax virtually any color you want! (Well, depending on what crayons you have on hand, anyway.)

So first, collect your crayons and determine what color you want.  You'll need the equivalent of about 3 full size crayons per 5 equally sized glue sticks.  A ratio of about 12:20 is a good sized batch to cover about 4 dozen bottles (a little less than a 5 gallon batch of beverage using 12 oz bottles.)  You can adjust your ratio as you go depending on how brittle or plastic you want your seal to be.  To test, your consistency, just drip some into cold water and attempt to break or crumble it.  More glue makes a more plastic final product, more crayons makes for a more brittle/crumbly final product.  This is also a great time to get rid of those pesky white crayons that rarely get used.  My 2-year old son actually brought me a white crayon saying it was "broken" because it didn't "color" on white paper.  The white crayons will add the same brittleness, without affecting the color much.  They will lighten your final color, but not nearly as much as I expected.  You can also use uncolored paraffin to equal effect, but I'd wager there's more unused crayons laying around your house than unused paraffin.

Now you'll need to prep your bottles.  The labels were applied earlier using an age-old, secret glue: milk.  It holds well and cleans up easily, and there's not enough there to stink or get nasty, it just dries out.  Rub a thin layer on with your finger, just enough to get it wet, then apply the label to the bottle and press out any bubbles with an absorbent cloth for a nice clean look.  For this reason, using a laser printer instead of an inkjet printer is highly advised so the colors don't run.  If you have any loose corners, you can reapply the milk to get it to stick down.


Now, with a heavy layer of wax, it can be tough to get a bottle opener to bite through the wax around the cap.  I used some ribbon as a pull tab to peel away the wax to get the bottle open.  It was difficult to get the ribbons to stay in place, so I put a little dab of hot glue on there to keep them in place while I dipped them.  I also put a little dab above the label to keep the ribbon in place where the seal stamp will go later. 

It's time to melt your wax.  A soup can on the stove over low heat makes a perfect melting/dipping pot.  I've seen others use a double boiler to melt their wax, but I don't want to stick my hand over boiling water if I don't have too.  If you're doing this with kids, a paper cup in the microwave can be used instead, but it will probably need reheated between bottles.  You could use an unwanted saucepan as a melting pot, but the wider your pot, the more wax you'll need to get the wax deep enough to dip into.  Whether in the microwave or on the stove, melt everything together and stir it with a craft stick to a nice even consistency.

Once melted, go right ahead and dip the tops of the bottles right into the wax.  You can either let it drip down the sides, or you could make a nice smooth edge by rolling or twisting the bottle as you bring it out.  I personally think a few drips look good, but too many look sloppy.  If you want to speed things along, have some cold water to dip into to set the wax faster.  I found a second dip covered the crimps in the cap so it looked a little cleaner.  I also found that tipping the can on it's side helps if you don't have a very deep pool of wax.  Dip the bottle in and roll it around for a bit.  You can see I was cautious and used an oven mitt, but in reality, if the can is too hot to touch, you're probably overheating your wax. I touched it afterward with my fingers and I could handle it comfortably.

For the stamp, using a craft stick, dip into the wax and drip some onto the face of the bottle.  Before it cools, press your stamp into it.  You can use anything from a real sealing wax stamp, to a coin or fancy button, to a plain rubber stamp.  I used a 1978 Aluminum Maltese Mil coin, basically worth a tenth of a cent, these went out of circulation years before I picked it up for obvious reasons.  The scalloped edge and very noble looking cross of St. John (a.k.a. Maltese Cross) gave it a nice classy flair.  Because I prefer my stamp to have a handle for ease of use, I took a gluestick, heated the end and pressed it straight onto the other face of the coin.  I sort of regret doing this, as I can't seem to get it off now.  But I have to keep asking myself what else I would use a Maltese Mil for anyway.  To ensure that your stamp doesn't get stuck into the sealing wax, keep the face of it in a shallow bowl of cold water, or the surface of an ice cube.  The cold will quickly set the wax, and the water will in a sense "lubricate" it to prevent adhesion.


And there you have it.  A sealed bottle.  This would be a great project for gifting homemade beverages, for empty decorative pieces, or even a message-in-a-bottle for a party invite or prom-posal.  If you're not sealing in a beverage, you don't necessarily have to cap it, basic corks will seal over nicely. If you're looking for a decorative piece, even a screw top bottle will work.  Decorative bottles are typically found at craft stores, sometimes restaurants will save wine bottles for you (some will not due to sanitary considerations), or you can buy new ones from homebrew or wine supply stores.

September 22, 2012

Primo Flavorstation for only $35?

I wondered when the Sodastream knockoffs would show up.  Enter the Primo Flavorstation. 

I'm not sure why I'm getting livingsocial deals to my inbox for the Washington DC area, but apparently for the next seven days you can get a Primo Water Flavorstation 100 for only $35 from livingsocial. It looks to be identical to the Sodastream, but only does 16.9 ozs (0.5 liter for you across-the-pond types).  I guess I can't knock it until I've tried it.  But I've long lamented the SodaStream's puny 1 L capacity, so the point of a half liter is sort of lost on me. 

One thing that Primo has going for them is their wide range of different appliances.  While the Sodastream folks have found different shapes of the same thing, including one designed by the legendary Yves Behar, Primo has actually come up with soda makers that perform different functions.  They have some that run off of 8g CO2 cartridges, some that run off of 12g, a number that are compatible with Sodastream's cylinders, some that have 0.5, 1.0, and 1.5 L bottles (this is definite progress), something called a turbo system, something called a Smart Wall, something called a Smart Wall with music (emblazoned with the slogan, "Sparkle & Dance" because who doesn't dance when making beverages), some that carbonate two bottles at a time (this is again, definite progress), a system that incorporates a water filter (I'll +1 that!), and then a couple that apparently dispense it straight into your glass and use little flavor cups much like the keurig coffee gadgets. 

So at first I was thinking this Primo Flavorstation business was just a "me, too" copycat.  Now I'm wondering who's the copycat now.  There's definitely some forward thinking and some solid R&D going on at Primo, no Yves Behar needed.  But, I'm not sure there's much necessity in having a soda maker that plays music, or in having the machine add the flavor for you (particularly for the still setting on that one, do you really need a machine to add water to flavor, really?).

Anyway, so I thought I'd throw that out there.  For $35, it may very well be worth a shot.

September 9, 2012

Kegerator


So I saved this fine mini fridge from certain death.  I came home one day and found that my neighbor was cleaning house and had this among some junk that was going to the dump.  I don't normally like to snag something that's designated as trash, but I couldn't resist and I asked my neighbor if I could rescue this.  He said that was fine, but warned me that they were pitching it because it was freezing up.  That didn't bother me much because I know numerous people on the homebrew forums use modified freezers anyway, so I brought it home hoping that it would hold a couple corny kegs.  After some cleaning and investigating, it turns out that it's freezing things up because the thermostat is shot.  This one didn't have a freezer shelf like a lot of mini fridges, so it is just tall enough for a keg without having to bend any crucial refrigeration parts.


It's only 3.6 cubic ft.  Some Google searching suggested that if I want to fit two kegs, then I'd need to upgrade to 4.4, but you can't beat free, so I'm ok with only one keg.  I set to work on the door, because it ended up only holding on keg, even with some modification.  I had to cut out the shelves from the door even to get one to fit.  The cover for the bolts was easy enough to pop off, then loosening these bolts was all it took to get the door off.  I ended up reversing the door so it swings from the other side now. 


 Once the door was off, I set it down and went to work pulling off the shelving.  All it took was to peel back the magnetic seal to reveal the screws that hold on the shelves.  I was surprised how thin the plastic was for them, and behind it is just expanding foam insulation covered with kraft paper.  Because the screws hold the magnetic seal in, which snaps on to the vacuformed shelves, I cut away the shelves easily with a razor.  The picture you see here is putting the edge of the shelving plastic back on so the seal will stay on the door.  


With the door off, you can see a corny keg fits quite nicely along with the tank and regulator.  I really wish that I could fit a second in here, because it's just so close.  I know some people have built an extension onto their fridges to fit a second keg or even a big 1/2 barrel sanke keg, but I don't want to go too ghetto. Someday maybe I'll get a Kegerator Conversion Kit but right now I'm content just to chill a keg in here when I need it.  Having the thermostat basically non functional, it makes it so the compressor is always on, or never on.  So I have to be careful how long I leave my keg in there.  I know that pop cans sometimes explode when frozen.  I'd hate to have that happen on a 5 gal. keg.  So I basically just plug it in for a few hours at a time when I need it.  It comes in handy and I don't have to worry about too much power consumption.  I'll probably get something like the STC-1000 Temperature control relay from either Amazon or Ebay and just use that.  That's typically what people use when they want to turn a freezer into a kegerator, which is essentially what I'm doing.  Here's one of the Homebrew Talk forum threads where it's discussed.  It's actually less expensive that way than getting an OEM thermostat replacement part.  The plus side is that I'll have a digital readout of what the actual temperature of the fridge is, the downside is that it only reads in Celsius.  Good thing I'm a scientist and not afraid of Celsius.

August 22, 2012

Book Review: Andrea Lynn - The Artisan Soda Workshop


from Ulysses Press
Available from: Amazon (also on Kindle), Barnes and Noble, (also on Nook)

So I announced this book back in April, when the release date was set for late May.  The Kindle version came out at that time, but the print version was pushed to July, then to August, and then back to July.  When I received the book, I was astonished at how small it is. I was expecting the 120 pages, but I wasn't expecting the 6"x6" format.  I can almost fit this book in my pocket.  That said, it still contains a fair amount of good information. 

The book is designed around the SodaStream.  That's what the author uses to carbonate her beverages, and so the method for each soda recipe is the same: carbonate water, add syrup.  That makes this book more of a syrup recipe book than an artisan soda book.  (Which is not to say that the syrups aren't artisan, because they are.) If you're looking for fermented recipes, you'll need to look elsewhere.  However, there's nothing stopping you from adding the appropriate amount of syrup to the appropriate amount of water, bumping up the sugar a touch and fermenting from there. 

Because this book was completely designed around carbonated water + syrup, there is a caveat in the opening paragraphs that the recipes are for how the author likes her beverages to taste, and they can be adjusted for more or less sweetness.  I agree that this should be the case, however looking at the sugar:water ratio in most of these recipes, there is no set standard.  Maybe I'm strange that way, but it really helps me when I'm creating a recipe to stick to a general rule of thumb for sweetness, and this book doesn't seem to have one.  I like to think of sugar levels in terms of lbs./gallon.  My preferred sugar level is 1 lb(2 cups)/gallon for most sodas.  This is equivalent to the directions on a packet of kool-aid drink mix, and is familiar to a lot of people.  With that in mind, I was astonished at the sugar level of Lynn's cola recipe.  The syrup calls for 1 1/2 cups of sugar, and ends up making about 60 oz of finished soda. That ends up being about 1 1/2 lb./gal.  This sort of undermines Lynn's statement about homemade being healthier: "Another benefit to going homemade is that you can cut down on sugar.  Most of the popluar sodas in this country are super sweet... you'll find that homemade sodas usually have a much lower quantity of sugar while still providing superior taste."  I guess the Keyword here is "usually".
Hmm... a 12 oz can of Coke has 39g of sugar, but Lynn's cola has about 57g of sugar in a 10oz glass.  I'll not fault Lynn too much, my lb./gal estimates put me at about 43g/12oz serving.  I also have to pass the buck further to the NY Times, as Lynn's cola recipe is very similar to Krista and Jess's adaptation of a Times Homemade Cola recipe listed here.

This brings to mind her mention that homemade is healthier because "you know exactly what goes into your soda".  While that may be partially true, knowing is apparently only half the battle.  Without a reference point, it's easy to go overboard on the sugar, as we can plainly see.

I shouldn't bash Lynn's work too much, the rest of her recipes have much less sugar than the cola recipe.  Her root beer recipe has about half that amount of sugar (which I think is backwards, I like root beer a little sweeter and cola a little less sweet).  A little shy on the sugar for my tastes, but other than that, it's a good recipe.  It uses sasafrass and burdock extracts; a combination that works very well with the molasses, anise, and cloves in the recipe.  Sasafrass extract is easy to come by from Pappy's, I'm not sure where to find a burdock extract that I would trust to be food grade, though other than getting the roots and doing it yourself. 

With it being 'artisan' there are a few other ingredients that may be hard to track down as well, such as the kumquats for the Smashed Kumquats and Rosemary soda, or juniper berries for the Kiwi and Juniper Berry soda.  I know these are not impossible to find, or maybe I'm not looking in the right places, but they're not your average soda ingredients.  In fact many of the combinations are non-traditional such as Mango-Chile, Lemon-Thyme, and Plum-Vanilla.  I can attest, though, that the Rhubarb-Basil and Pineapple-Basil are excellent combinations. 

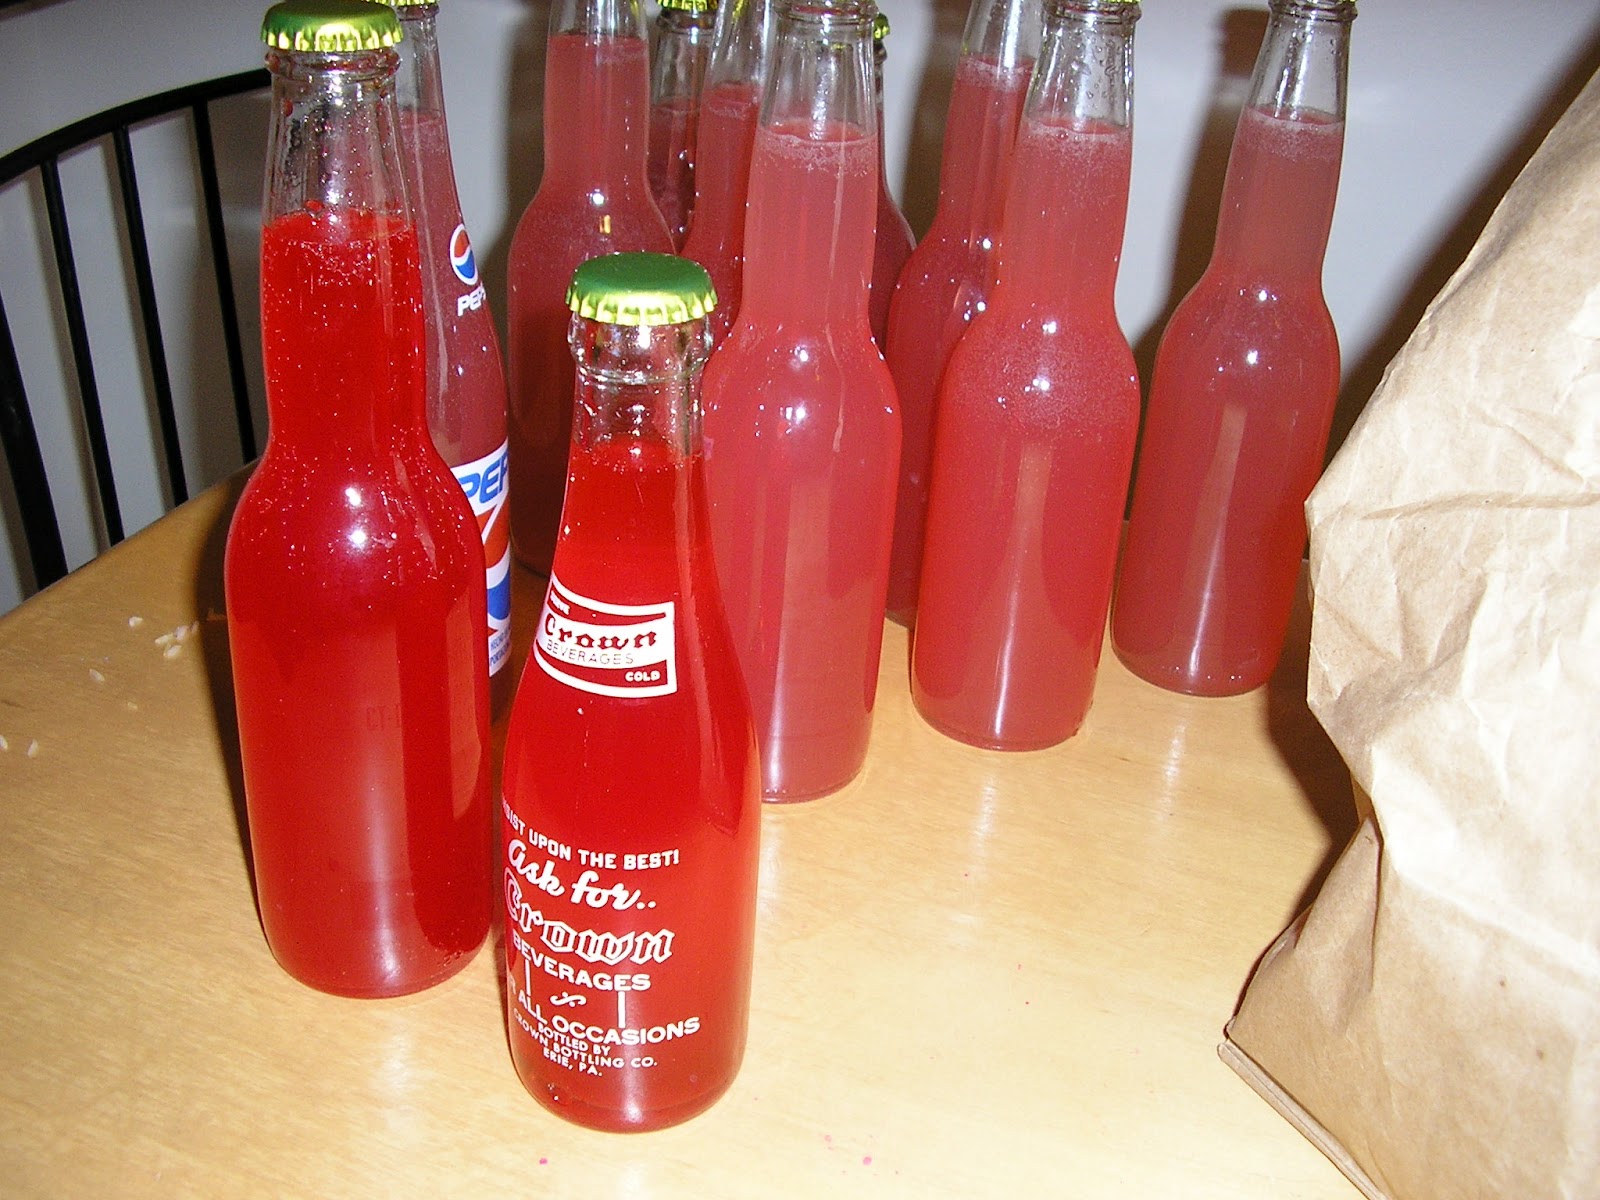
My favorite to make was the Blueberry-Lime syrup.  I used fresh picked blueberries, as they are in season, and the flavor came out wonderful.  I was a little concerned with how long the recipe calls for cooking it.  In my experience most fruits burn easily when cooked in sugar.  But I stuck to it and it came out just fine.  The recipe also calls for adding lime juice at the beginning, whereas I prefer to add citrus juices just after removing a syrup from heat.  This allows you to use less citrus for the same flavor impact.  The recipe for the finished soda is big on blueberry flavor and light on sweetness.  I would add more sugar if I were to do it again.  It comes out with beautiful color as seen in most of the many full color photos in the book. 

Aside from the soda syrup recipes, there's a section on shrubs and aguas frescas that I have yet to try.  I find shrubs an interesting class of beverage, though it's been a good while since I've made any. Lynn's recipes seem to have good variety and look relatively easy to make.  They all follow a similar procedure and include a fermentation step, but include unique ingredients such as pepper or balsamic vinegar.  That's part of what I like about the book.  Even though there is some repetition in procedure among the recipes, that's really what gives you the experience you need to understand the process and branch out on your own. 

There is also a section on sparkling cocktails that include some of the syrups previously found in the earlier chapters.  For entertaining guests, this would be very impressive for those who drink. 

All in all, it's a fairly well rounded little book aside from a few inconsistencies such as the sugar levels.  In short, this is a book that caters to the Sodastream owner: the procedure is the same as that with proprietary Sodastream syrups, the batch sizes are comparable the Sodastreams capabilities yet are flexible enough to allow other carbonation methods, the artisan style and flavors of the syrups are just the kind of exotic combinations that a foodie adventurist is looking for (i.e. Watermelon-Jalapeno Agua Fresca), and they're all relatively simple.  For the Sodastream user, it's a great step to making your own soda flavors rather than just mixing store-bought syrups. In that sense, it may very well be a "gateway drug" to moving beyond the small capacity of the 1L Sodastream.  Trust me, upgrading to a kegging system is a good thing.

What the book lacks is a greater breadth of carbonation techniques; a true 'artisan soda workshop' should include fermentable recipes, and straight carbonation recipes for flavors that might be damaged by the high heat used when boiling to a syrup (such as anything with a high citric acid content).  The small size for the price could be a turn-off for some people, but it certainly does have some good recipes.  Speaking of price, this book is also not for those DIYers who are in it for economic reasons.  Making your own soda can be economical.  That was one big draw for me at the outset.  However, with a lot of specialty ingredients and the small batch sizes, I really don't see a lot of cost savings here.  I don't think that the book was ever meant to be that, the word "artisan" should allude to that fact, but if that's what you're looking for, you're unlikely to find it in this book.  I also find some oversights that could have been corrected with perhaps a little peer editing.  For example, the concord grape syrup recipe uses 100% grape juice and boils it down from 2 1/2 cups to 1/4 cup.  I thought that it made more sense to start with a frozen 100% grape juice concentrate when making this recipe.  You'll damage a lot more of the flavor cooking down that far than a commercial low-heat/vacuum process does to the concentrate you'll buy at any grocery store, and you'll pay less money with a concentrate.  The picture for that particular soda does look a little caramelized like the colors were damaged in that much heating, too.

For what it is, it's a decent enough book that I don't mind adding it to my collection.  The recipes are exotic and tasty yet simple and the full color photos are absolutley beautiful.  I do, however, find myself wanting more.  I want some straight carbonation recipes, I want to be able to bottle these, and I want some bigger batch sizes. 

June 30, 2012

Quick Kegging Recipes

So it's already the weekend before the 4th of July and you need kid friendly kegged beverages for your picnic.  If you're going to make some beverage for your Independence Day bash, there's just enough time to get brewin'!
Here are some easy kegging versions for some of the recipes I've posted.

Key to any good kegged recipe is going to be keeping it as cold as possible.  It carbonates faster and more fully, it stays carbonated better, and it tastes better.

To keep it easy, I always try and do 1 lb sugar per 1 gallon of finished soda.  The only exception has been the homemade cola recipe that worked out so well with less.  (Soon to be posted, I promise).  I prefer to heat it to invert it, which takes a lot longer when you're doing 5 pounds of sugar.

So here are those recipes I mentioned earlier:

Lime in d' Coconut:
2 - 17 oz cans coconut water
1 - 15 oz bottle lime juice.
1 1/2 teaspoons citric acid (substitute one cup lemon juice)

In a large brew kettle or stockpot, heat sugar to invert, add 1 gallon of water, and the coconut water.  This makes sure the sugar isn't too thick and hard to work with.  Pour into keg, add citric acid and lime juice. Top up with water.  Seal the keg and pressurize to 30-35psi to carbonate at 33-35°F. At that temperature and with some occasional shaking, it should take about day or two.

Ginger Ale:
2 Tablespoons Ginger Paste
32 oz Lemon Juice

In a large brew kettle or stockpot, heat sugar to invert, add 1 gallon of water.  See reasons above.  Separately, heat ginger in 1-2 gallons water to just before boiling. Strain ginger pulp out.  Discard pulp and add infused water to keg with sugar and lemon juice.  Top up with water.  Seal the keg and pressurize to 30-35psi to carbonate at 33-35°F.

Sarsparilla:
1 Tablespoon Sarsparilla Root
1 Tablespoon Wintergreen Leaves
2 Tablespoons Molasses
3 oz Vanilla Extract

In a large brew kettle or stockpot, heat sugar to invert, add 1 gallon of water.  See reasons above.  Separately, heat sarsparilla and wintergreen in 2 gallons water to just before boiling. Strain out roots and leaves.  Discard them. Add infused water to keg with sugar and lemon juice.  Top up with water.  Seal the keg and pressurize to 30-35psi to carbonate at 33-35°F.

So there you have it.  15 gallons worth of soda recipes.
I really hope that I didn't leave anything out.  If you feel like these have been overly simplified and you have questions, feel free to ask in the comments or my email has been listed under the About Me profile.  I'd be glad to answer them.

I also would have added pictures, but if you've seen one ball lock keg, well, you've seen them all.

June 20, 2012

National Ice Cream Soda Day

Nothing like a tasty butterbeer float
to celebrate Ice Cream Soda Day.
Rumor has it that today, June 20th, is National Ice Cream Soda Day.  I'm not sure who declared it as such, and there seems to be some confusion on the web as to whether it's June 20th, June 30th, or Aug. 2nd.  (I've seen a mention of Aug. 2nd being National Ice Cream Sandwich Day, which if you read it too quickly might be confused with ice cream soda.  So I think that's out as the official day.)

I tried finding out where this originated, and all I got was a history of the ice cream soda, and Wikipedia has some interesting alternative names for specific types of ice cream sodas.  I'm not sure I agree with their inclusion of butterbeer, though. 

So, who decides when a day is a Day? (note the capital D)  Anyone, apparently.  There are official federal and religious holidays such as Christmas, Thanksgiving, President's Day, etc.  Those would be days where you get off work.  Then there are federally recognized observances, some are declared by the president and some by congress, such as Flag Day, Father's Day, Mother's Day, etc.  Those days are sometimes celebrated, but not usually as important as "holidays".  Then there are Days.  Nothing official, just a day that someone, somewhere, at some point in time, decided to declare.  Sometimes you'll hear about it on the radio, sometimes you'll see it on a blog, and sometimes you'll see it as a marketing gimmick.  Ice Cream Soda Day is one of those Days in the third category.  So, with that in mind, even though it's not official, I have a keg of root beer and a keg of butterbeer and some ice cream, and we're going to celebrate ice cream soda day anyway. 

So I have no reference to why it's celebrated, or who decided that we even should, but on this day, raise your sticky, frosty, foamy glasses high.  Here's to you Mr. Green, self proclaimed inventor of the ice cream soda!

P.S.
Save some room for Root Beer Float Day, Aug. 6th.

May 11, 2012

SodaStreams at Walmart

I know some people come here looking for SodaStream recipes, so I thought this news would be welcome to those folks.

News was released this week by the San Francisco Chronicle that SodaStream will be selling it's products at Walmart.  While they have been available at places like Kohl's and Bed Bath and Beyond, they reportedly want to be selling in supermarkets, and Walmart is the first step in that direction.  (Even though Walmart is technically a hypermarket, if I'm not mistaken.  I guess it makes little difference.)

So if you don't have a Kohl's or Bed Bath and Beyond, and you do have a Walmart in your area, you will be pleased that you will no longer have to order online.  I wonder what type of deal they've worked out with Walmart on CO2 refills.  I'm still of the mind that their proprietary refill system is too ridiculously costly. 

The San Francisco Chronicle hints at the Walmart announcement being a factor in their stock prices rising, but MSNBC reports otherwise,

"The company may have only seen a 15% increase in the number of starter systems it sold, but the higher-margin CO2 refills and soda flavors were up 29% and 52%, respectively. Soda sippers were also willing to pay more for all three products."

Read as: Price hikes and higher margins on consumables equals higher profits. Yes, they're raking in money on the CO2, for sure.  I pay about $1/lb for mine, which I could nearly cut in half if I had a larger tank, but to fill their 14.5oz cylinder, I think the cheapest I've seen is about $14 with an exchange.  So it looks like the only way I'd buy a sodastream, is if they had a 95% off coupon for their CO2 refills.

But I guess there's a certain charm to having a carbonator on your kitchen counter, so if you're looking for a Sodastream, keep your eye out at Wally World.

Update 6/4/12 : I didn't think it would be so soon, but I have seen basic Sodastream kits at Wally World for $79. I'm guessing that's nationwide.  They also carry the syrups, I'm not sure the pricing on those.  I'm not sure what their plan is for CO2 refills.  Probably similar to Bed Bath and Beyond.


April 30, 2012

Recipe 17: Sanguinella (Blood Orange)

So apparently I haven't posted a recipe in a while.  I've been playing with citrus juices lately, and I've been close to posting a couple of tasty recipes, but they're not quite complete yet.  I'll post this one because I'm satisfied with the way the syrup turned out.  I'm going to see if I can get some citric acid to adjust the syrup, and make it super tasty.

I found some blood oranges at Wal-Mart of all places, and I couldn't resist picking up a bag.  It's been a while since I had a good sanguinella, though if I remember right, San Pellegrino has a good one.  Update: Yes, I found some in cans at Wegman's, I'll have to add that to the taste test mentioned below.

So here we have one orange juiced and three more ready to go.  I peeled these, sectioned them and put them in a blender after removing as much pith as I could.  That may or may not have been a good idea.  That bitter pith flavor still comes through a little bit, perhaps it's from the pulp.  Makes you feel like you're eating a fresh orange, though, so if that's what you're going for, then great!

From these three oranges, I ended up with about 1 cup of juice.  I was a little shy of the 1 cup mark, so I made up the difference with lemon juice to add some extra tartness. 

After squeezing the juice through a clean juicer bag to separate out the pulp, I added that to some invert sugar syrup scaled for a gallon of finished soda.  (Invert Sugar Recipe, thanks to Chef Eddy).  Add the juice to the hot syurp to kill any natural yeasts and then add that to your carbonated water.  Done.

1 cup Blood Orange Juice mixed with Lemon Juice for added tartness, ratio depends on desired tartness
2 cups sugar, inverted

Top up to 1 gallon with carbonated water.

I'm fairly happy with how this turned out, it could have used the citric acid that I wanted to add, but didn't.  I have some Blood Orange Monin syrup to compare it to, and I'm waiting for the right time to do a side by side taste test.

 When I bottled this, I was very impressed at first with the color of the two syrups.  Pardon the blurry photo, but right is my syrup and left is Monin's syrup.  Monin's is a little darker, but not by much. 
 Here's a clearer photo, monin is the bottle at left and the one with the funnel behind.


 Once filled the Monin was still a bit darker, not to mention clearer than mine.  Those natural colors do dilute quite readily, apparently. 
As far as taste goes, I have yet to really taste them side by side.  I have to get my hands on the San Pellegrino.  But it does seem like the Monin has a "brighter" orange flavor.  Mine is a bit more "dull" and ever so slightly bitter, like biting into an actual orange, not just sipping the juice.  Still pretty good if you like oranges. 

Update: It's taken me so long to post this, I'm not sure that you can still get blood oranges in the store anymore, they're a bit out of season.  But theoretically, this recipe should work well with any citrus juices.  I have some meyer lemons that are aching to be used in a beverage that I'm planning on trying out rather soon.  We'll see if the recipe still holds up there.

April 24, 2012

The Artisan Soda Workshop by Andrea Lynn

Edit: For those of you returning here, the release date for this has been changed from May 29th to July 10th.  The Kindle edition is apparently already available, but physical book in hand is not.

I figured it was about time to post something.  There are a number of recipes that I've been working on, but I want to polish them up before posting.  So in the meantime, I also wanted to take a minute to let people know that in searching for homemade soda recipes, you're not alone.  I'm very much a DIY'er, and it seems it's common among those of my generation.  If you're reading this, you're probably part of that generation.  I've seen a steady increase in traffic, and I'd like to thank the internet community for taking an interest in what I have to share!  I associate the increased interest in homemade soda with what Wired Magazine calls the Next Industrial Revolution which is a really cool article if you have the time to make it through it.  Who knew cars could be crowdsourced?  There seems to be a constant and welcome increase in information available on homemade soda.  With the release of Andrew Schloss's Homemade Soda book last year (which I reviewed here, excellent book by the way) my library for homemade soda books doubled. 
It seems that there's more to come with Andrea Lynn's The Artisan Soda Workshop.

This doesn't become available until the end of May, but you can be sure that I'm going to get my hands on a copy to add to my library.  When I do, I'll post a full review for all folks interested.  It promises some very interesting recipes, for sure.  Rhubarb Basil sounds interesting, I'm not sure it would be something I'd consumer regularly.  Sea Salt Lime sounds scary, I've tried salting my butterscotch/butterbeer recipes and that never ends well.  Prickly Pear and Plum Lemon sound really tasty!  Lemon-Thyme sounds like it's a maybe.  As in, this may be the drink you never knew you loved.  But maybe not.  It looks like I'm going to have to wait until May to find out.  I'm definitely stoked, though. 

So, to recap, here's the dedicated soda books that I know of:

1998 Stephen Cresswell's Homemade Root Beer, Soda & Pop  Classic, great basis for making soda.
2010 Darcy O'Neil's Fix the Pumps More of a history, as I understand.  Still need to get my hands on this.
2011 Andrew Schloss's Homemade Soda Lots of great recips, highly recommended.
2012 Andrea Lynn's The Artisan Soda Workshop We'll see how it ranks come May 29th.

Hmmm, I see a trend.  What will 2013 hold I wonder?  If these Artisan recipes from Lynn are any indication, I think we'll be seeing some wild combinations soon.  That said, any ideas for great, wild recipes posted in the comment box will recieve some serious consideration. 

January 10, 2012

Ball Lock Keg O-rings For Sale

The Homemade Soda Expert is pleased to offer ball lock keg o-rings for sale!

When buying used pre-mix soda tanks, some of the seals are in less than perfect condition.  I opened my own up recently and found the dip tube o-rings to be kind of gunky.  I just needed the dip tube seals, but it seems that no-one really offers just those.  I'd have to buy a whole kit, and you don't really find savings on ordering multiple kits.  The lid o-rings tend to hold up rather well, so I don't anticipate needing one for some time.  The bottom line is that I saw a number of needs that needed filled.  Now I'm glad I can fill them. 

Available for sale are full kits of Buna-N o-rings which include one lid o-ring, two post o-rings, and two dip tube o-rings.  These are all the seals on a keg.  I am offering one kit for $3, two kits for $5.50, three for $7.75, or four for $10.  Not a huge savings at each step, but in this economy, every little bit helps.  These fit ball lock kegs, I don't have any pin locks, so I don't feel comfortable selling pin lock kits just yet.  Maybe in the future when I have something that I know I can test them on. 

Because the dip tube o-rings are the first to wear out, followed by the post o-rings, I'm offering smaller kits as well.  That way you don't end up replacing a perfectly good lid o-ring if you don't need to.  A pack of post and dip tube seals with enough for 5 kegs or a pack of just dip tube seals for 10 kegs are each $3

You will see a paypal button in the sidebar that will be there permanently. 

These will also be available on ebay, if you're worried about a blog not being a secure market place.  Look for supramansquee as the seller.

I hope to be able to offer other products in the future, I don't think this will ever bloom into a full blown homebrew store, but I'd like to maybe sell some bottle caps and other items eventually.  Comment below if there's anything you'd like to see sold here.

January 5, 2012

Syrup Review: Master of Mixes Cocktail mixes

So every time I pass the beverage aisle at the grocery store, I see the cocktail mixes and think, "A piña colada soda would be really tasty."  So my birthday rolled around and I thought it would be a great time to put it to the test.  We picked up a bottle of piña colada mix and a bottle of strawberry margarita/daiquiri mix. 

Regrets are usually prefaced by "It seemed like a good idea, at the time" 

So, it seemed like a good idea at the time.  I think this, and the coconut flavored La Croix I had over the holiday have kind of turned me off of coconut for a while.  I seem to still be ok with coconut and lime together, but on it's own, or apparently with pineapple, it doesn't seem to go down as smooth.  I think it reminds me too much of lotion. 

Aside from the coconut flavor, I do have some problems with the Master of Mixes.  There's an off flavor in each of the mixes I bought.  It's almost a salty flavor that I can't quite put my finger on.  The body of this syrup is great, for syrup.  I'm sure it works great blended with ice, but it just doesn't mix well with seltzer.  It sinks even with some agitation.  With enough agitation to get it blended, you lose your carbonation rather quick.  The strange thing to me is that one of the first ingredients listed is HFCS, but for how thick it is, it doesn't seem to be very sweet.  I can't quite figure that one out.  The coconut cream certainly is not water soluble, so it leaves a bit of a bubbly sludge on your glass.  The strawberry is made with real strawberries, which is always a good thing, but I know my kids don't like the sediment.

I think that I may try some other brands of cocktail mixes, but the Master of Mixes is definitely off my list.

So the Master might be mixing up some tasty cocktails, but as for soda, that's best left to the experts. Not to toot my own horn or anything.
Related Posts Plugin for WordPress, Blogger...