November 29, 2011

Holiday Gift Ideas for the Soda Maker in all of us!

As Christmas gets closer and everyone is scrambling to come up with gift ideas for those difficult people on their lists, I thought I'd help some people out.  For the soda jerk on your list, or any jerk or non-jerk for that matter, here are some essentials that no homemade soda maker should go without. 

First on the list is ready made syrups, Monin has a very nice selection of 102 full sugar syrups from basic to floral to fancy including some nice holiday flavors.  I've been working on a pumpkin pie soda, but it's just not working out.  I suppose this is the next best thing, they have a pumpkin spice and a newer pumpkin pie:

Torani is another great syrup manufacturer. They have about 75 full sugar syrups.  Most of these are more traditional cafe flavors, but some like Bacon seem to stand out. 

For those looking to make their own syrups, there are a miriad of options.  One that I've been meaning to try is using flavoring oils.  LorAnn oils has a nice selection of candy, beverage, and chocolate flavors.  They're super concentrated, so you you're not paying for excess sugar and water, you can add that yourself.  Choose individual flavors, or blend them to create your own.  These would be helpful in creating that supposed secret Coke formula floating around the internet that uses cinnamon oil, nutmeg oil, and some various citrus oils.


If you're unsure about mixing oils to get a flavor base, you can use some more water soluble options from Rio.  These are available from the Praire Moon company.  These are normally sold as snow-cone flavoring mixes, but work well for homemade soda.  I had some friends in high school that earned money over the summers with a shaved ice stand by the city pool.  They had the best shaved ice around, that's for sure.  They used some of these syrups for their shaved ice, and they are quite tasty.

In my opinion no one serious about homemade soda should go without a keg system.  There is a sense of superiority and control that comes with kegging.  You can keg what you want, in what quantity you want, with the exact amount of fiz that you want, and you can dispense as much as you want without losing carbonation.  Granted it doesn't fit on your countertop like a Sodastream might, but who wants more gadgets cluttering up your counter anyway. 
Ball lock kegs are becoming increasingly hard to find, and the price keep going up on used kegs, but new kegs seem to be coming down in price.  I imagine supply and demand will eventually even that out.


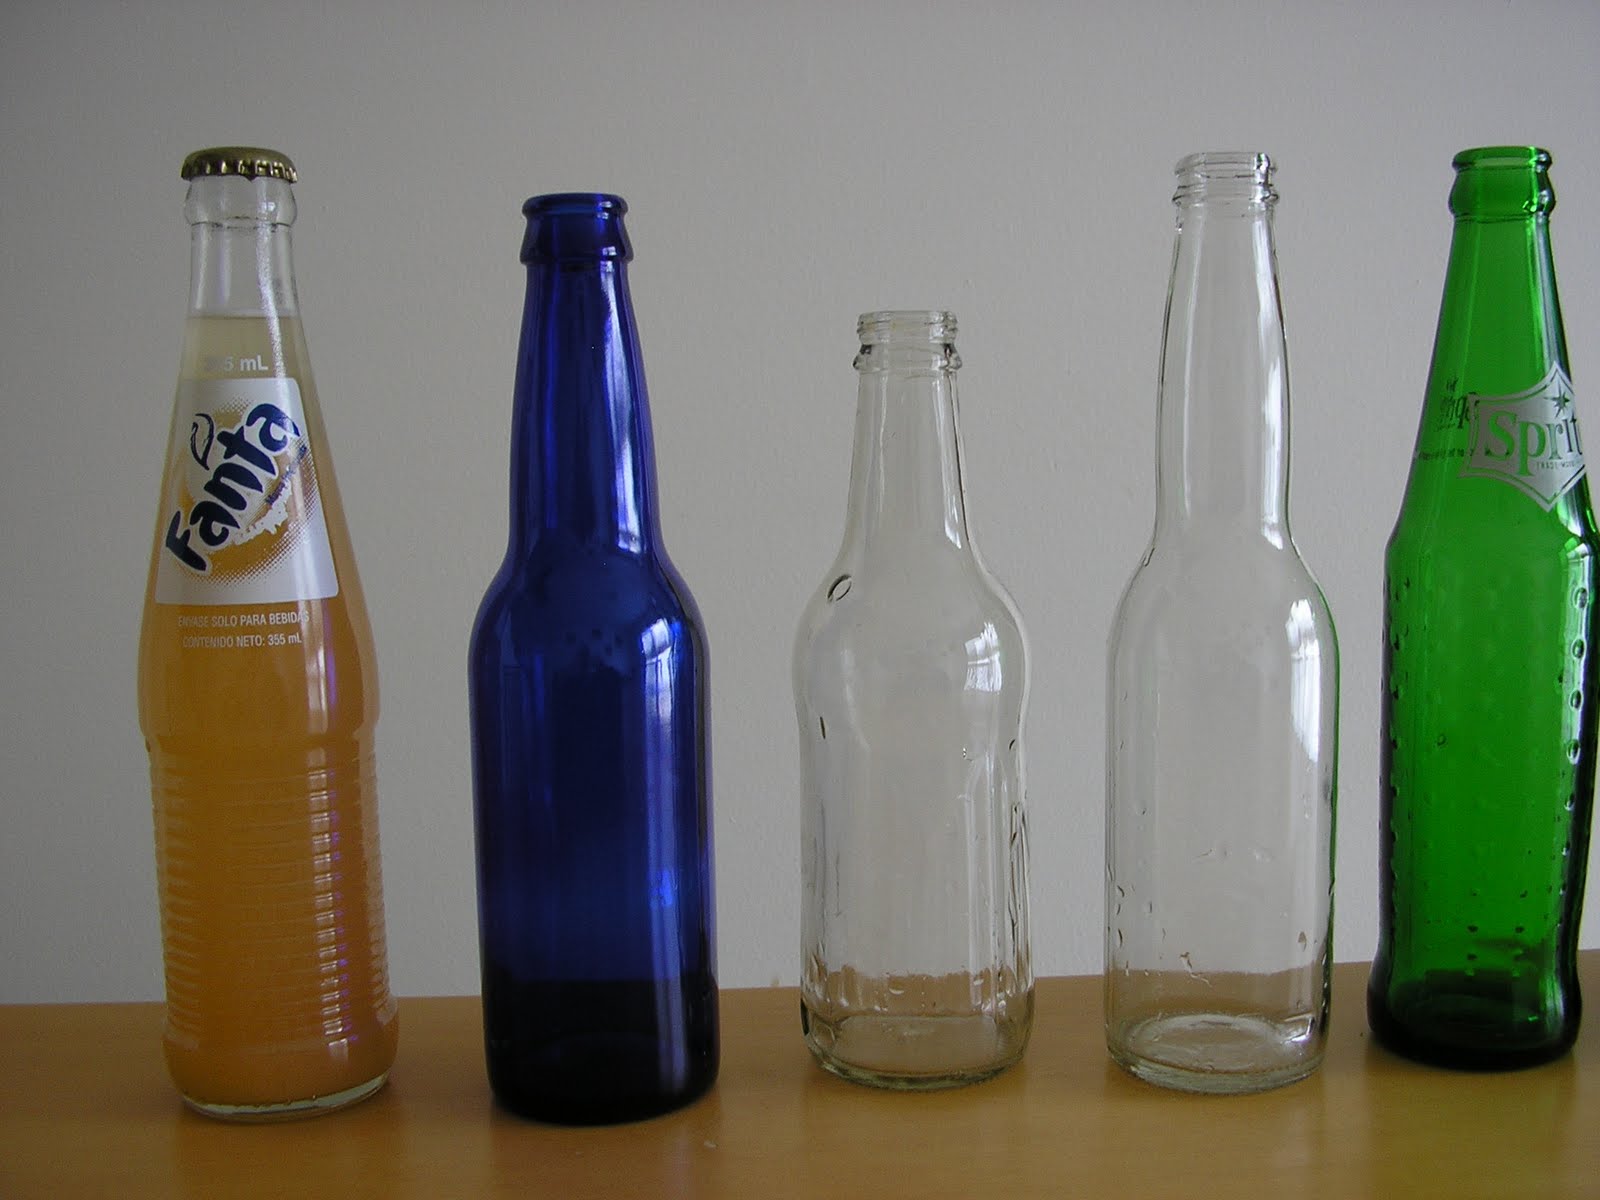
Anyone Bottling should have some nice nostalgic bottles.  You can dig up old ones, and worry about what gunk might be in them, or you can get some new 187 mL champagne bottles in either clear to show off your colorful sodas, or green to hide your less than desireable colors.


Another great bottling option is the 125th anniversary Coke Hutchinson Bottles available this year.  I've seen these in four packs at the local Wal-Mart, though I can't find a link for you online.  These are limited release, but would make great additions to anyone's bottle collection.  Soda maker or not, these are just neat.


And of course there's always the old standby, Martinelli's.  These are one of the few recappable bottles widely available.  And for the Holidays, why not.  I'm assuming that both the 8 oz and 24 oz are recappable.  I don't see why they wouldn't be.  Anyone with any input, feel free to comment.

Of course, if you're going to bottle, who doesn't need more caps.  If you're looking for the most inexpensive option, MoreBeer! seems to have the best price, particularly on their overrun caps, though they're not always in stock.  If you're looking for some more personalized options, most homebrew shops have various colors.  For something completely custom, you can try BottleMark, Crafty Caps, or Brew Toppers.


And of course you'll need something to get those caps off.  StarrX bottle openers are classic, and you can find some cool vintage ones on Ebay occasionally.  You can also get them new for your home bar, soda fountain, or I've thought about attaching them to a wooden crate to take bottles to parties and gatherings.


If you want to get started, I'm sure Andrew Schloss can help.  His book is very handy and has lots of great recipes that are great alone, or as inspiration to build your own.  With 200 recipes total, this book will keep any soda maker busy for a while.  These recipes are focused mainly on using carbonated water or a soda siphon, but there are a fair number of brewed beverages here as well.

If you want to stick with brewing and bottling, nothing is as classic as Stephen Cresswell's book.  This book got me started and I still refer to it.  Great root beer recipes and tips on bottling, recipe development, and troubleshooting.


So there you have it, that's my 2011 gift guide for soda makers. I hope you found some inspiration for the soda maker on your list.

November 23, 2011

Recipe 16: Holiday Gingerbread Soda

In time for the holidays, here's a lovely concoction for your holiday gatherings.  To adjust to your ideal gingerbread flavor, try varying the levels of molasses, and ginger, as those are the main flavoring components.  The caramel malt adds depth and "breadiness" to the flavor, getting you closer to ginger bread and further from spiced ginger ale.

Gingerbread Soda (makes 1 gallon)

2 1/8 cups sugar
1 cup water
1/4 tsp cream of tartar
1/8 cup caramel malt, cracked
1 tsp ground ginger
1 tsp ground cinnamon
1/2 tsp ground cardomom
1/4 tsp ground clove
2 Tbsp molasses
cold carbonated water up to 1 gallon (2 2-liter bottles)

Combine sugar, water, and cream of tartar, bring to a boil, simmer 20 minutes. Allow to cool. In a separate saucepan, heat 1 1/2 cups water to just before boiling. You will see small bubbles form at the base of the pan, but they shouldn't rise to the top. Turn heat to low to maintain this temperature. Add in the caramel malt and all the spices. Steep for 30 minutes covered. Allow to cool. Strain out the grain and spice sediment and add to the sugar solution with the molasses. Add to carbonated water and mix gently until dissolved.

October 20, 2011

Recipe 15: Halloween Root Beer with Dry Ice

As the harvest season approaches, there are invariably countless Halloween parties at which homemade rootbeer is a staple. I don’t know if it’s the dry ice in the bubbling “witch’s brew” that makes us think of Halloween, or if enjoying a root brew has always been traditional this time of year. One thing is for sure, whenever I think of homemade soda with dry ice, I think of the large orange beverage cooler bubbling at a church Halloween party, with little kids hoping to get just a little sliver of that dry ice in their cup so they can watch it bubble and “smoke” until it quickly disappears.


If you’re planning a party with just such a brew, here are some tips on carbonating with dry ice to get the best carbonation in your beverage.

- A general rule of thumb is 1 lb of dry ice/gallon. This is going to bubble like crazy, so make sure you have a lid for your orange beverage cooler to contain the splashes.

- Also easy to remember is 1 lb of sugar/ gallon. This may seem like a lot, but it is the same amount of sugar as Kool-Aid, so it’s nothing you haven’t imbibed before.

- How much carbonation a drink will hold is mostly a function of temperature and pressure. As the drink gets colder and the more pressure the drink is under, the more carbonation it will hold. Increasing pressure can be difficult and dangerous (especially with 5 lbs of dry ice), placing the lid on the cooler will certainly help, but you’ll get more results with keeping it cold. Dry ice will chill it, but you’ll be much farther ahead if you start out as cold as you can go. Leave it in the refrigerator overnight if you have that much space, or add some of your water as ice. With that much sugar you should be able to get it just below 32 degrees before it freezes.

- You’ll get more mileage out of your dry ice if you don’t add it all at once. Add about 1 lb and stir until it’s gone. The agitation will ensure that you get even cooling, pH adjustment, and carbonation from the first pound, then add the rest and let it sit.

So why does dry ice carbonate water? Dry ice is solid carbon dioxide or CO2, it’s held at a temperature of about -110F. Instead of melting, it sublimates, meaning it goes straight from solid to gas. As the gas bubbles through the water, some of it dissolves into solution, creating carbonic acid, or H2CO3. Carbonic acid readily breaks down at room temperature and pressure to 1 molecule of CO2 and 1 molecule of H2O, carbon dioxide and water. Many people think that the tingle of soda in their mouth is the bubbles, but part of it is the bite of the acid.

5x5 Halloween Root Beer Recipe:

5 gallons water

5 lbs sugar

5 lbs dry ice

5 ounces extract(2 oz rootbeer, 3 oz vanilla)

Combine water, sugar, and extracts in a 6 gallon or larger beverage cooler (you’ll need extra space so it doesn’t bubble over). Make sure this is as cold as it can possibly get, or chill it overnight if you have space. 1-2 hours before serving, add 1 lb dry ice and stir until dissolved. Add the rest of the dry ice and let it sit for the remainder of the serving time.

I wish I had a lovely picture of this, it's always fun to see all that bubbling brew.  Maybe closer to Halloween one will pop up, no pun intended.

October 13, 2011

Recipe 14: Homemade Mountain Dew / Sun Drop Clone

Let me preface this by saying I'm not a Mountain Dew drinker.  Really the only time that I can think of that I actually drank Mt. Dew and said "Wow, this is good!" Was after being in Italy for a year and a half drinking the bitterness they pass off as soft drinks. 
I shouldn't say that, Italian beverages are fine.  Some are an acquired taste, but there's nothing inherently wrong with them.  They do run light on the sugar, though.  So it's possible that my taste of Mt. Dew that made me think it was a good drink was based on sugar content.  I love sugar.  When I returned back to the States and acclimated myself to standard US syrupy goodness, Mt. Dew was just kind of *meh*.  So this may not be an exact match, but it's a start for anyone looking for a match. 

2 cups sugar, inverted in 1 cup water (with 1/4 tsp cream of tartar, see recipe below)
Juice from:
2 oranges (about 1/2 cup)
2 lemons (about 1/2 cup)
2 limes (about 1/4 cup)

1 cup water
Peel from:
1/2 orange
1/2 lemon
1/2 lime

Carbonated water up to 1 gallon.

Combine sugar, 1 cup water, and cream of tartar. Bring to a boil and simmer 20 minutes.  Allow to cool. Bring the other 1 cup of water to a boil separately. Add the citrus peels, remove from heat and cover. Allow to steep until it has cooled to room temperature. Strain and add to sugar solution, along with the strained juices Ensure it is well blended. Add to carbonated water and mix gently until dissolved.

This has a bitter citrus bite because of the peels, there's that acquired Italian influence sneaking in there.  Feel free to adjust as you see fit.  If your a Mt. Dew drinker because of the caffeine, you'll need to add that separately. As you can see, it's not as green as the commercial version, but does it really need to be?

I'm thinking that this does need some work, but it's at least a start.  I know some people online have been looking around for something like this, so here it is!

Update July 2014: Because this is such a popular recipe, I've included it in my book - Making Soda at Home.  The recipe there takes on a slight variation and also includes methods for carbonating via fermentation or force carbonating like pre-mix rather than just making a syrup to add to carbonated water.


October 8, 2011

Homemade Soda: Cheaper than Store Bought?

I like to keep tabs on what homemade soda information is available on the web. A couple weeks ago I found this article from the Christian Science Monitor by a Trent Hamm. It talks about the other costs associated with drinking homemade soda, particularly health costs.  In my opinion, it seems a bit narrow minded and kind of misses the mark.

I agree that drinking that much sugar is not anything near healthy. But there are some calculations in the article that could use a second look. The article compares Sodastream cola to Coca Cola. First, let's look at the financial aspect: The article says that using the Sodastreams syrups you spend about $0.40/liter.  One thing they forgot was the ridiculous amount you end up paying for a cylinder exchange.  Generally, about $15 per cylinder which works out to an extra $0.25/liter.  So sorry kids, you're spending $0.65/liter for Sodastream beverages.  Compared to the $0.70/liter for cans of Coke.  So you'd have to drink 1600 liters for you to make the initial machine investment worth your while.  You'd be way worse off in reality than what you thought following Hamm's method.

As far as the health aspect goes, what Hamm doesn't realize is that each serving of Coke has 100 calories while each serving of Sodastream Cola has only 35 calories.  27g of sugar compared to 8g.  So in reality, you'd only be consuming 112 lbs of sugar from that amount of Sodastream cola rather than the 380 lbs of sugar you'd consume from that amount of Coke.  Hmm... that sort of waters down his claim about the health consequences of the Sodastream.  Even if it is still more than Hamm's original estimate, it's actually sort of a selling point for the silly little contraption.  Though, that's still a ton of sugar.

Perhaps the best way to look at it economically are the following two scenarios:
Club Soda - For some strange reason, I can't find a decent sized bottle of seltzer anywhere in this town.  The largest bottle I've found is a 1L, and the cheapest that's been is $0.50.  Now I know there are companies that make 2L bottles, but I guess there just isn't a market for that here.  Anyway, The soda stream could carbonate water for $0.25/liter as noted above for cost of the CO2.  So you'd have to drink 320L of club soda to break even on the device.  Plus, no significant negative health consequences.  That's still a lot, but not as bad as the cola. 
And since I'm by no means trying to sell the Sodastream to anyone, let's look at my method: the soda keg.  I can carbonate water for about $.09/liter.  However, I paid more for my setup, so I actually don't break even until I hit 365L of club soda, so kind of a bummer.  

Gourmet Soda - Coke is like the Buick Century of sodas.  It's a staple.  Decent, but ubiquitous and thus, inexpensive.  In fact, some places use the name Coke to mean any type of soda.  What Hamm doesn't take into account is the quality of homemade soda that equipment like this can churn out.  What we're looking at here is a not a way to duplicate the Buick, but a way to build our own Alfa Romeo.  I'm going to consider a recipe from Andrew Schloss that in my opinion is even better than an Italian import, San Pellegrino Limonata.   I can buy a six pack of 330mL cans of Limonata for about $6.  That's about $3.03/liter.  Ouch!  But, honestly, it's worth it.  Schloss's recipe in my setup gets me a better product for about $0.99/liter.  Huzzah! So I really only have to make 144L of that for me to break even on my equipment or 42L on the Sodastream... interesting.  Additionally, when I can make something that good, I'm going to want to share it so I can show of my beverage making skills. So I guarantee that I won't be drinking it all by myself and I won't be shouldering that health burden of all those extra calories alone. 

The bottom line: soda isn't the best choice of beverage, but if you want to make it yourself, you do have a little bit more control over your finances, your health, and the quality of your soda compared to drinking standard commercial fare.  

August 5, 2011

August 6th is National Root Beer Float Day! - Recipe #13 Homemade Scratch Root Beer

Tomorrow, Aug. 6th, is National Root Beer Float Day! Since it is a national holiday, here's two recipes as a special treat from me to you. Root beer is what got me started in this hobby, and I'm glad that I can finally share a recipe with you that I can be proud of. This recipe uses actual roots instead of an extract. If you can't find any roots or you're worried about safrole and prefer to avoid it, then McCormick's extract is probably the route you should take as it's available in almost any grocery store. So kick back and celebrate tomorrow with a completely homemade root beer float.

Recipe #13 - Homemade Root Beer

2 1/8 cups sugar
2 cups water
1/4 tsp cream of tartar
1/4 tsp dried wintergreen leaves, crushed
1/8 cup sassafras root twigs, cut in 1/4" pieces
1 oz vanilla extract
1 drop pure anise extract
1 Tbsp Molasses
Carbonated water up to 1 gallon

Combine sugar, 1 cup water, and cream of tartar. Bring to a boil and simmer
20 minutes. Add molasses and allow to cool. Bring the other 1 cup of water to a boil separately. Add sassafras and wintergreen, remove from heat and cover. Allow to steep for 1 hour or until it has turned a deep red/brown color. Strain and add to sugar solution, along with vanilla and anise extracts. Ensure it is well blended. Add to carbonated water and mix gently until dissolved.

This root beer is bold because of the molasses, but not too bitter. Enough vanilla to be similar to A&W, but more boldness from the molasses, so it's not a true clone. Works perfectly for a root beer float!

Homemade Ice Cream:

1 pint heavy cream
2 1/2 cups 2% milk
1 1/4 cups sugar
2 drops lecithin (optional, available where bread baking ingredients and supplies are sold)
Vanilla to taste

Combine milk, cream and sugar in a saucepan and stir over low heat until sugar is dissolved and mixture begins to steam. Add lecithin and stir until mixed well. Remove from heat and chill. Once chilled, pour into your ice cream maker as per the instructions. Once the mix is frozen to the consistency of soft serve, place in a freezer container and freeze overnight to harden. Makes about 1 1/2 quarts.

Now, you have just enough time to gather ingredients and enjoy your root beer float!

July 13, 2011

Recipe 12: Harry Potter's Butterbeer v2.0

As promised, and just in time for your release party or after party or whatever. This recipe works much better for a couple of reasons. First, I eliminated most of the salt, which was just too much for this. I may experiment with it more down the road, but why mess with success. Second, I used an invert sugar syrup to get more sweetness out of the same amount or less of sugar. If you need help with that Eddy Van Damme can help. He recommends going to 236F, That came out to boiling for 25 minutes for me.

That being said:
1/4 cup caramel malt steeped with a dash of cinnamon in 2 cups of water and filtered, see the v1.0 recipe for help on this point
1 Tbsp molasses
1 1/2 cups invert sugar syrup (about 1 lb granulated sugar)
2 1/2 tsp butter flavoring
1/2 tsp vanilla
1/2 tsp rum flavoring
dash of salt
6 drops yellow food coloring

Top up to 1 gallon with carbonated water.

This syrup came out to about 1/4c syrup per 12 oz finished beverage. It could stand to be a little sweeter. Filtered water will do you wonders. If you have chlorine in your water it will give a bit of an off flavor.

All in all, the added flavors stand out above the malt, but it's still there to give a good flavor base to build from that makes this different from a buttered rum or butterscotch. All your muggle friends will be jealous.

Also, I'd like to showcase here that Pepsi has followed Coke's lead and started selling it's Mexican produced version (No high fructose corn syrup) in glass bottles. I picked up this one at Wegman's in Erie, PA. I like the Pepsi bottle better than the Coke bottle, probably because it's more generic in shape and I can easily strip the printing and create my own label if I want. It's also the same height as my other 12oz bottles, so my bench top capper doesn't need adjusted in between bottles.

June 29, 2011

Book Review: "Homemade Soda" by Andrew Schloss


from Storey Publishing
Available from Amazon (also on Kindle), Barnes and Noble (also on Nook).

I saw that this was released early this May and I have been aching to get my hands on a copy. On the surface, it appears to be an updated version of Cresswell’s book, some recipes even look similar. Schloss’ 7-Root Beer (pg. 94) bears some resemblance to Cresswell’s 10 Root Spring Tonic if only in complexity. Deeper examination reveals that the two are companions, rather than one replacing the other. Schloss’ book seems to have more of a “health food” slant, with sections on sparkling waters (similar to a carbonated mineral or vitamin water) plus herbal and energy drinks. However, the book does have its fair share or more of indulgent recipes as well. Where Cresswell is the expert on basic, tried-and-true stand by recipes, Schloss writes to the established foodie who is unafraid to try new and unconventional culinary concoctions and blends such as prune and chocolate, rosemary with berries, and ancho chile and lime. Even the the array of classic recipes is more diverse with a couple of different colas and even the original Orange Crush recipe (pg. 66).

His intended foodie audience is ever apparent when considering all the recipes are scaled to single servings, most likely for those accustomed to venturing alone into uncharted culinary territories. I have felt that disappointment myself when I have made even a one gallon batch of beverage which I am left to consume alone. That being said, each recipe is scaled differently depending on the most convenient and most appropriate preparation method.

Schloss’s book is set up similar to Cresswell’s in that he begins with an intriguing history of carbonated beverages. While Schloss’s history seems more inclusive, some pieces don’t seem to fit with that recounted by Cresswell. Which is more accurate is hard to say, nonetheless a moot point. Along with the history, Schloss occasionally hints at imminent scientific discussion, only to vaguely yet tastefully steer away from it. For a food scientist like me, this is a bit disappointing. For the average foodie, this seems a natural flow of discourse more directed toward great flavor rather than the nitty gritty chemistry.

That particular slant is actually one thing that makes the book great. Schloss’s passion for things new and exciting, as well as for mimicking old stand-bys, shows through in every recipe, no matter how simple.

Schloss makes his recipes more appealing to a wider audience by providing multiple carbonation instructions for most recipes. He offers up instructions on carbonating in a siphon (force carbonating), mixing with seltzer (post mixing) or brewing (natural carbonation from yeast). Some recipes do have instructions for all three, but some recipes lend themselves better to different methods, such as the Fermented Honey Soda. Fermenting gives a more complex flavor and would be more like a traditional mead, whereas force carbonation will be more of a honey sweetened seltzer with a more simple flavor.

A disadvantage perhaps unseen by many would be that many recipes are to be made and consumed right away. Certainly those recipes for which brewing instructions are included can be stored for some length of time, but the rest would not bottle well due to ingredient concerns. Some have ingredients susceptible to microbial contamination (there’s an entire section on cream sodas, most using real cream or milk) if stored for a length of time, others have ingredients that would settle out or separate if bottled. While these are still great recipes, and Schloss makes no pretense that these recipes can or should be bottled, the reader should be sure they know the implications of bottling should they choose to do so. I personally think that there is something to be said for “bottle conditioning” certain sodas, as certain flavors change (for better or for worse) over time.

With most of the recipes being single serve or small batch, those making their own sodas for economic savings over commercial sodas may be disappointed. Some specialty ingredients are necessary for certain recipes that may make them more costly. The reader should keep in mind that the commercial equivalent of Schloss’s recipes would definitely fall under the category of boutique or gourmet sodas along the lines of Thomas Kemper and Sprecher or better. Even the most simple recipes compete at the gourmet level. Such as the Sparkling Honey Lemonade (pg. 58), which is at parity with an authentic Italian limonata such as San Pellegrino, yet more complex with the floral notes provided by the honey. These recipes are certainly for the artisan soda maker, the craft brewer and the DIYer who’s looking for something incomparably better than what’s available for commercially.

With 200 recipes, including a myriad of recipes for foods made with homemade or commercial sodas, Schloss definitely adds inspiring variety to any homemade soda brewer’s repertoire. I highly recommend a copy.
"Homemade Soda: 200 Recipes..." by Andrew Schloss


June 27, 2011

Recipe 11 - Harry Potter's Butterbeer v1.0

This is something that I've wanted to do for a long time even before Universal starting selling $4 cream sodas topped with butterscotch cream at their park. Having read the Harry Potter series a couple of times, I was very intriqued with the butterbeer concept. I thought it must be a flavor similar to butterscotch or butter rum, but it would have to have something that differentiated it from those two for it to have the beer moniker. I came to the conclusion that the chief distinction would have to be the source, I have some Briess caramel malt 20L for another project, and thought it would be a good fit.

When I made up the syrup, it tasted fantastic! Once I hit it with the carbonated water, it was actually quite the opposite. Like the chocolate recipe I posted earlier, I'm posting this with the caveat that it is not a completed recipe, but rather a work in progress. Stay tuned for version 2 and pictures to come. Don't worry, I'll be sure and have a perfected recipe with plenty of time to brew a batch for your Deathly Hallows Pt. 2 release party!

Yield is 1 gallon:
1/4 cup caramel malt, cracked
1 cup brown sugar
1 cup white sugar - caramelized
1 Tbsp molasses
1 tsp butter flavor
1 tsp salt

Once you have your caramel malt (available at a homebrew supply store), you'll want to crush or crack it. An adjustable grain mill is what I use, and it works quite well. If you don't have a mill, you can steep them whole, and crush them with the back of a large spoon while they are in the pan about 10 minutes in. This is not quite as effective as the mill, but it works.

In a saucepan, steep the crushed malt in 2 cups of water for 30 minutes at 170F. If you don't have a thermometer, bring your water to just below boiling. It should be steaming and you should see small bubbles clinging to the bottom of the pan. At this point, turn your stove to low/medium low to hold that temperature throughout steeping. Once finished, strain out the larger pieces of grain and allow the rest of the sediment to settle out.

After it has cooled and the sediment has settled, filter through a coffee filter. I've found that if you slowly decant off the top portion through the filter first, you can remove most of the sediment without clogging the filter.

In a separate dry saucepan, caramelize the white sugar over medium heat while stirring constantly. You want the sugar to caramelize evenly, so as you're stirring, try and keep the melting sugar in contact with the bottom of the pan for as little time as possible, it burns rather quickly. Once most of the sugar is melted and the overall color is golden, slowly add 1 cup of water. It boils on contact, so be careful, stir it as you add so the melted sugar doesn't harden in the water.

Once all your water has been added and the hissing and spitting has died down, you'll want to add the brown sugar, molasses and salt and heat until dissolved and the volume has been reduced significantly. At that point, add your malt water, mix well, and allow the syrup to cool. Once cooled, add the butter flavor and you're ready to add carbonated water up to 1 gallon.

So after making this, it's very apparent that there's simply too much salt. It was salty enough that I poured out about half the batch. Some suggestions would be to throw out the salt entirely, and substitute another cup and a half of brown sugar for the 1 cup of white. Other than that, this would be an excellent beverage while enjoying your favourite quidditch match. Er... something like that.

June 11, 2011

Book Review: Stephen Cresswell's "Homemade Root Beer, Pop, and Soda"


from Storey Publishing
Available from Amazon (also on Kindle), Barnes and Noble (also on Nook)

This is the book that got me started on homemade soda. I was searching for what roots were in root beer and came across this in a local library. No library is complete without a copy. One thing that makes this an excellent resource for someone looking to create homemade sodas is that Cresswell gives a clear context on what it takes to start from scratch and work your way up to being an advanced brewer. The book is planned perfectly to help the reader step by step. He begins with an engaging history on root beer and carbonated beverages in general which is in itself worth picking up a copy. Indeed every page instills romantic nostalgia for all things soda related. Cresswell lays out a discussion on necessary equipment, categorized according to what’s necessary and what’s just nice to have. As many hobbyists know, understanding what might be extraneous when just starting out is always encouraging when starting a new hobby. Then, the recipes begin with easy, 4 and 5 ingredient first batch recipes and Cresswell works the reader up through more complicated recipes on to helpful tips for many aspects including creating one’s own recipes, using natural roots and other ingredients, and troubleshooting what might have gone wrong in the event of a bad batch. In addition to being well versed in pop’s history, Cresswell also provides historical and vintage recipes from yesteryear, even as far back as
Colonial America.

Included recipes range from simple old-fashioned root beer to the spicey Virgin Islands ginger beer and the interesting Russian kvass. In addition to bottled drink recipes, there are a number of traditional beverage recipes for smoothies, spiced coffee drinks, and even egg nog.

Creswell is very up front about doing things the old fashioned way – carbonating with yeast, bottling in glass bottles. While this is part of the allure of homemade soda, this becomes one of the book’s shortcomings in that Cresswell only briefly discusses other methods for carbonating and glosses over the safety issues of natural carbonation in glass bottles. Most homebrewers will consider unchecked fermentation in glass as “bottle bombs”, i.e. when there is enough sugar to cause the bottles to burst. It is usually suggested on forums and elsewhere that soda brewers reuse commercial PET bottles, whereas Cresswell mentions that while plastic bottles will work, they have limited use.

Another downside is that the book is somewhat dated on ingredient sourcing. Ingredient sourcing is now a breeze with specialty internet shops selling bulk roots and herbs. There was much less of this in 1998 at the time of the book’s release, leaving the reader feeling limited to local flora for ingredients which are often regional and seasonal.

The book does however have an excellent reference section, including references for the historical recipes found throughout the book. The references are a great resource for those wanting to delve deeper into other homebrewing, digging for local roots and herbs, and searching out more vintage recipes and history.

At 120 pgs, the book is a great way to get a jump start on homemade soda, without feeling
overwhelmed with complicated recipes or feeling like you’re plowing through a thick university text.

Homemade Root Beer, Soda & Pop

April 14, 2011

Recipe 10 - Ginger Ale / Ginger Beer

This is a very easy brew, and a pleasure to make a beverage completely from raw ingredients. I'm not a fanatic about the health benefits of using natural ingredients nor am I at all concerned about knowing exactly what's in my food. I know some people are, so I won't bash those two schools of thought. I just really enjoy making things completely from scratch.

For the syrup:
1 cup brown sugar
1 1/2 cup white sugar
juice and zest from 1 lemon
ginger root roughly the size of your thumb.
2 cups water

Grate the ginger root and lemon zest into a saucepan in 1 cup of water. Simmer covered for 20 minutes and allow to steep while cooling for another 20 minutes. Strain this mixture to remove the pulp, then filter through a coffee filter. Replace the pulp in the sauce pan and repeat with the second cup of water. This is not extremely necessary, but I feel like I get the most flavor out of the mash this way. I could be crazy, though.
Add your ~2 cups of filtered liquid to the white and brown sugar in a clean saucepan. Bring this to a simmer to dissolve the sugar and add the lemon juice.
This amount of syrup is meant for 3 gallons of beverage, so add carbonated water accordingly.

Ginger Beer vs. Ginger Ale
While most are familiar with ginger ale, there conflicting opinions on what exactly ginger beer is. Jamaican style ginger beer is a soft drink similar to ginger ale, but very spicy with some strong ginger. English ginger beer is an alcoholic drink home brewed from a ginger beer plant, which is a combination of certain strains of yeast and bacteria, skimmed off from the drink and saved for subsequent batches. There's a company in the UK that will sell you a portion of ginger beer plant if that's what you want to do.
This recipe, as presented, is spicier, with more citrus notes and less sweet than a typical ginger ale, but milder than a Jamaican ginger beer. In my opinion, this is easily adjusted by the amount of ginger you add, less for ginger ale, and more for ginger beer.

April 5, 2011

Recipe 9 - Chocolate Twizzlers

This recipe was interesting to say the least. An experiment more than anything. I started out thinking, "Can I make a root beer without using a root beer extract?" As I put half of the ingredients in, I decided to switch mid-stream and try another round of chocolate and see how much sediment you get if you use actual cocoa powder. I knew it was haphazard, and that it could be very awful.
What it ended up being was reminiscent of Chocolate Twizzlers, strangely enough. Though, it's been a while since I've had them.

So here it is for 1/2 gallon:

1 cup sugar
1/8 cup Molasses
1 Tbsp Cocoa Powder
1/2 cup water
1/4 tsp butter flavoring
1/4 tsp vanilla
2 quarts carbonated water

Heat the sugar, molasses and cocoa powder in the water until the sugar is dissolved and the cocoa dispersed, then remove from heat. When the syrup has cooled, add the butter and vanilla flavors. Top up with carbonated water.

With cocoa powder, there will be noticeable sediment, but a good swirl before opening and you should be fine unless you open the bottle warm... which resulted in a gusher. Oops.'

March 31, 2011

Recipe 8 - Strawberry Rhubarb


This is a recipe that I've wanted to do for quite some time. I finally got my chance when I found some rhubarb at the grocery store by chance. I don't think rhubarb is in season right now, so this probably didn't taste quite as delicious as it could have, but it was a tasty enough brew to warrant a write up. I shared some of this with some friends of mine, and it was very well received. They thought it was commercially viable, but that's not a step I'm ready to take yet.

For One Gallon:
1/2 lb rhubarb
1/2 lb strawberries
1/4 cup lemon juice
2 cups water
2 cups sugar
2 dashes salt
1 gallon carbonated water

Chop the rhubarb and the strawberries and place them in a saucepan with 1 cup of water and 1/8 cup of the lemon juice. Bring this to a boil while stirring. The strawberries and the rhubarb will break down and you'll need to strain the juice through a sieve, jelly bag or cheese cloth. I've found that one round of filtration isn't quite enough. So when filtering my homemade soda,
I put it once through a jelly bag, and once through a coffee filter. The jelly bag removes the large pulp that would quickly clog the coffee filter, and the coffee filter removes most of the finer sediment. What you're left with after the coffee filter is a very fine sediment that takes quite some time to settle out and is imperceptible after a slight shake to the bottle.
The pulp that is left from the jelly bag still has some flavor, put it back in the pot, add the second cup of water, and bring to a boil again, then strain and filter a second time.
Once you have your 2 cups of juice, in a separate pot, add the sugar and heat until dissolved. Remove from heat and add the last of your lemon juice. Now you have a nice tart syrup, top up to 1 gallon with carbonated water.

March 30, 2011

Recipe 7 - Homemade Apple Pie Soda

This was delicious, the flavor is a bit light and not too sweet, but very tasty and very simple, provided you have a green apple syrup.

For one gallon:
10 ozs (1 1/4 cups) Monin Green Apple syrup,
3/4 cup brown sugar
1 tsp cinnamon
1 gallon carbonated water.

For one 12 oz bottle:
1/8 cup green apple syrup
1 Tbsp brown sugar
dash of cinnamon
10-11 ozs carbonated water.

Bring the three flavor ingredients just to boiling in a saucepan while stirring then remove from heat to get a thick syrup. Chill then add to carbonated water. Yes, it's that simple. In the future, I'd like to try and make this with Granny Smith apples, but that will be for another time. For now, I'm going to add a scoop of ice cream and enjoy a la mode!

Other green apple syrups can be substituted. The recommendation from Monin was 2 oz syrup to 10 oz carbonated water, so I cut that in half and made up for the reduced sweetness with the other flavors. I'd imagine following recommendations from a syrup such as Torani, then baking down to account for other flavors would be similar and work just as well.

I like the flexibility of this homemade recipe, because it's so easy to do by the glass or single bottle. I can easily whip this up in a few minutes, or keep to small batches if I know my keg is close to empty and I won't have enough carbed water for a larger batch. Just be sure that if you're bottling you should boil first, even if the simplicity is enticing enough not to, you want to make sure you don't have anything wild start to ferment in it. This is obviously less important for single servings that won't sit for long periods of time.

March 27, 2011

Equipment - The BierMuncher Bottle Filler

I've been doing a lot of browsing on the homebrew forums posted in the links section and found this bit of advice suggested to me by a number of members. This is a pseudo counterpressure bottle filler that works beautifully from a keg and keeps more carbonation in your beverage better than any other method I've ever seen.

It's simply a racking tube with a #2 drilled rubber stopper. These can be purchased from a homebrew supply store for just a few dollars. Remove the black piece at the base of your racking cane, and slip on the stopper.


Hook the top of the cane into your keg's tap and you're set!


As you bottle, place the base of your tube in such that the stopper is nice and snug in the mouth of
your bottle. You'll need to hold this in as you pour, which is easier said than done depending on your pressure that you've carbonated at. As your beverage is dispensed into the bottle, you'll see the flow stop, and the liquid in your bottle will show no bubbles. SLOWLY release the pressure by squeezing the side of the stopper. This is like slowly opening a 2-liter bottle, and the slow release of CO2 will be gentle and you won't lose as much carbonation.
It you're careful and cap immediately, leaving minimal headspace, you can still retain excellent carbonation levels.

A couple of things to keep in mind:
-For optimum results, be sure to keep everything very cold, the bottles, your syrup, your keg and it's contents. Gas is more soluble in a cold liquid than a warm liquid.

-The stopper fits some bottles better than others, so choose your bottles accordingly, unless you have access to a wider variety of drilled stoppers.

-Be careful about relieving pressure. Release it too fast and you'll blast soda all over your kitchen. The more agitation you have, the more carbonation you'll lose.

March 2, 2011

Recipe 6 – Strawberry Ginger Ale

This turned out to be a tasty beverage, though not as tart as I’d like. I think I’m going to have to order some citric acid to start using in my recipes. It has just enough ginger to give it an extra zip without standing out over the strawberry.

Syrup:

2 ¼ cups sugar

1 -8 oz can strawberry nectar

¼ cup lemon juice

¼ tsp ground ginger

¼ tsp strawberry extract

-Filter the strawberry nectar. This time I took the time to do this, and I was very pleased with the results. There is still some sediment, but not nearly as much as the peaches n’ cream.

-Add sugar, ginger and nectar to a sauce pan and heat just to simmering.

-Remove from heat and add the lemon juice and the extract. I also added a few drops of food color for show.

This should be enough syrup for 1 gallon of carbonated water. I ended up using 1/3 cup syrup per 12 oz bottle, which turned out to be a little too sweet.

This would be a very refreshing summertime beverage. Too bad it’s not summertime as you can see from the picture. You can also see that there is very little sediment, unlike the peach. No shaking required!

March 1, 2011

Recipe 5 – Peaches N’ Cream

After my banana recipe, I’m not sure why I decided to do another “cream” recipe. Again this one had NFDM in it, but since it didn’t seem to be a problem before, I wasn’t so concerned. I’m also not sure why I didn’t think to filter this one after my experience with the banana recipe. It turned out alright, though. Here’s what I ended up with:

Syrup:

1 – 7.5oz can Peach Nectar

¼ cup Nonfat Dry Milk

2 ½ cups sugar

1/8 cup lemon juice.

1 tsp vanilla extract

-Dry blend the sugar and Nonfat Dry Milk. Add it to a sauce pan.

-Filter the Peach nectar through a coffee filter to get the pulp out, then add it to the sauce pan.

-Bring this to a simmer to get the sugar dissolved then add the lemon juice and remove it from the heat.

-Once it cools, add the vanilla.

This should give you enough syrup for a gallon of carbonated water. As you can see from the picture, it's super easy!

Dry blending the sugar and NFDM will make sure that you don’t get clumps of milk powder in your syrup, so make sure that it’s blended so that there are no lumps.

Filtering the nectar is going to be key to making this look good. I didn’t do this and I got a bunch of pulp in my soda. That’s fine if you like dregs at the bottom of your bottle, but if you don’t want a soda that requires you to “shake well before opening” you should filter it. I don’t mind it myself, but I want other people enjoy these and floaties in your bottle have a certain “ewww” factor that I don’t people to associate with my sodas. I thought that nectar would be more flavorful than just juice, but now I’m starting to rethink that plan. I think I’ll go with clarified juice from now on. It will be easier to work with and probably taste about the same in the end.

I added some food coloring to make it look less drab, if you’re into the “no artificial flavors or colors” then that’s fine, too.

This actually tasted better than I thought and the pulp sludge wasn’t so bad. I remember peach nectar being gritty with pulp, but this actually went down pretty smooth. Like the banana, though, this seems to be missing the creamy note a little bit.

February 25, 2011

Recipe 4 - Banana Cream

I keep forgetting to post this, even though it was something I made quite some time ago. Similar to the chocolate, it was less than perfect, though decent if you adore true banana flavor. I don't have any pictures at the moment, it wasn't much to look at.

Syrup:
1 Banana
2 cups of sugar
1 tsp vanilla flavor
add to:
1 gallon carbonated water

The recipe is basic. Mash the banana, add some of the sugar and some water and start to simmer. I strained the pulpy mash through a sieve. If I hadn't been so impatient, I would have pureed it beforehand, simmered it and then strained it through a coffee filter. But instead I had little floaties in my syrup. Consequently, there were little floaties in my finished soda, too.

It tasted like freshly mashed banana, of all things. Imagine that. I wanted it to taste like banana cream pie, hence the vanilla. I found myself missing the cream and the pie portion.

Again this is another one that could use more development and feedback.

February 23, 2011

Bottle Sources

I've been looking into fancy glass bottles to use. Just for fun, I'd like to get some bottles and either pad print or etch my own logo onto them. Then craft a matching wooden crate to store them in, also emblazoned with a custom logo. First, I need a custom logo.
Until then, I'm left to digging up pieces of nostalgia that would bring back my parents' childhood memories or seeking out current production glass bottles with pop off crown caps.

Most of my bottles are the blue Nittany Ale bottles seen in posts from last year. While these are great quality, thick, beautiful bottles, they hide the colorful brew inside. I like to use them for root beers, butterscotch, and other such recipes that aren't much to look at. But it's hard for me to justify hiding that lovely coconut lime when I mix it up.

My clear 12 oz. longneck bottles are actually Corona bottles that I cleaned up and scoured the labels off. While these are the most common clear bottles I've found with pop-off caps, they're thin and I'm worried that they're more prone to breakage. Scouring labels can get old, and since I don't drink beer and they're an import, they're hard to come by. Coronita bottles also work, they're 7 oz.

Most sodas come in quality bottles, a lot come in clear, but most are twist off. I've been reusing Crush bottles, but twist offs don't cap well. They get stuck in the capper and I don't think they seal as well. Rumor has it the threads can wear out and break, leaving you with glass shards and an unusable bottle.

My favorite is 187mL champagne bottles. You can buy them new, they're nice and thick, and if you didn't know they were champagne bottles, you'd think they were old time soda bottles. They're very close in size and shape to the old 7 oz. 7up bottles.

Speaking of old 7up bottles. I picked up a few of these and I do love them. Old bottles can be fun to collect, not to mention rewarding. If you happen to find an amber 7up bottle, they can be worth quite a bit to collectors. They do need a good cleaning, though. Some have been left in garages, barns or attics for years, so you do want to select and clean them carefully. With everyone crying about going green, I'm surprised the returnable bottle hasn't made a comeback. I understand why from a logistics point of view, but I'd expect to get over it. GlassBottleSoda.org has a listing of places that still do returnables, but they're still fading.

If you want the look of old time bottles with the peace of mind of newer bottles, Mexican sodas often have pop off crown caps. Mexican Coke is particularly popular right now due to misguided fear of HFCS. Some say it also tastes better without the corn syrup, I'm skeptical, but I don't drink much Coke, either. I'm not sure how I feel about the Fanta bottles though. They look classic, but their still not that aesthetic.

There are a number of "boutique" beverages that are difficult to find that use pop off caps. Usually bottles from other countries use them. I've found San Pellegrino Aranciata, Limonata and Chinotto in 7 oz. bottles that use pop offs, I've even found 2 or 4 oz. bitters from the same brand, though I'm not sure of the practicality of that. Q brand Tonic water has an interesting bottle as well. I've seen that in a couple of places. Fever Tree has Club Soda and Ginger Ale in 6 oz longneck bottles. You do find a few here and there, but I've never justified buying them, due to the fact that I have nearly 100 perfectly good bottles. Yet somehow, I just want more. I must be addicted.

Pictured here for comparison from left to right are Mexican Fanta, Nittany Ale, Crush, Corona, vintage Sprite, vintage 7up (12 oz and 7oz), 187mL champagne, and Martinelli's Sparkling Cider.

Feel free to comment if you find some fabulous sodas with pop off caps so as to create an ongoing list of useful reusable bottles.

February 18, 2011

Recipe 3 - Chocolate Soda


Ok, this sounds really delicious, even though it looks awful. But by posting it I don't intend for anyone to think that it's finished.
In practice it was just kind of... alright. I'm open to feedback.

The exercise here was to try and come up with something that didn't just use a chocolate flavor, I wanted to use actual cocoa, but without having it settle out. I'd hate to advise the consumer to shake well before opening. That's generally discouraged. I also wanted something that didn't taste like a Tootsie Roll. It should be creamy, so I wanted to know the implications of putting dairy into a soda. The jury's still out on that one since I used very little.

Here's what I used:
Syrup:
1/4 cup cocoa powder
1 Tbsp nonfat dry milk
3 cups sugar
desired flavors

Equipment:
Coffee Filters, Funnel, Sauce Pan,
Step 1. Steep the cocoa - Boil 4 cups of water, remove from heat, add cocoa powder, let sit 1 hour.
To avoid the cocoa settling out, I decided to steep the cocoa powder and strain out the particulates.
Step 2. Strain the cocoa water - Pour the mixture through a coffee filter placed in a funnel.
In the beginning this worked great, but as I began to strain more and more, it got slower and slower and slower. I think I went through about 5 filters.
Step 3. Sweeten - Blend the sugar and nonfat dry milk and add it to the strained liquid. Bring to a boil again.
Just like any other syrup.
Step 4. Flavor - Add small amounts of any flavor you'd like to compliment your soda.
Vanilla for a creamy flavory, Orange will taste like those whack and unwrap chocolate oranges at christmas time, Peppermint is good too. I also tried Rum for a truffle flavor, it didn't work too well.
Step 5. Carbonate - For this amount of syrup, I used about a 1.5 gallons of carbonated water from the keg.
This turned out to be 2 ozs. syrup per 12 oz bottle.

It turned out that the chocolate flavor faded and got lost in the fizz after a couple of days. Also, I'm a little concerned about what the pH might be on this, so I'd keep it in the fridge if you make a large batch.

Let me know what you think, pictures to come soon.

February 3, 2011

Christmas Spoils

This past Christmas, my wife decided to spoil me with a keg setup from Midwest Supplies. It's exactly what I wanted to carbonate my water and stop dealing with club soda or dry ice (which seems to be strangely lacking in any of the supermarkets where I live).
It's extremely easy to use, though a bit more difficult to clean. I'm not so worried about the cleaning part unless I'm actually carbonating a beverage in it instead of just water.

There are some other pros and cons worth mentioning.
Pros:
Ease of use.
Volume - It's very handy to have 5 gallons of carbonated water to bottle some beverages with, much better than that silly SodaStream contraption being peddled lately. 20 times more volume for 1.5 times the cost. I'd say that's value. I'm not sure how many gallons I'll get out of a 5lb CO2 tank, so far I've done 3 and still holding strong.

Cons:
It does take some time to carbonate, though I'd imagine not nearly as long as would natural carbonation from yeast. Overnight seems to do the trick just fine, but I've also read a day for every 10psi.
If you do actually put a beverage in it other than water, you get lots of foam coming out (which is very bad for bottling, and difficult to serve in cups), and you're o-rings tend to soak up the flavor. You can switch sets, but each additional set is around $10.
Don't let the kids knock over the CO2 tank and damage the regulator, that could be dangerous.
Difficult to chill 5 gallons of water.

So over the month that I've played with it, it's been a lot of fun, but still not quite getting the carbonation in my bottles that I'm looking for. I've been close and I'll share my progress and recipes as I can. For all the cons, the pros definitely win out. Now I just need to get more ingredients.

Which is where the next little bit comes in: Monin syrups! They have an excellent array of flavors and you can order directly off their website. My wife picked up the Green Apple, and at the right concentration, it tastes just like Jones Soda's Green Apple. Though unfortunately not any more economical. One bottle of Monin will make a little over a gallon of soda at that concentration, which is about 11 bottles. You can easily get the same amount of Jones for the same price.
Related Posts Plugin for WordPress, Blogger...