November 16, 2012

Homemade Soda Holiday Gift Ideas 2012

It's that time of year again.  Halloween is over and Thanksgiving is sneaking up fast.  As of this post, there's only one week until the dreaded Black Friday.  The Holiday shopping season is upon us.
So now you need some gift ideas for that special someone who has taken up a sodamaking hobby.  We can be a hard bunch to shop for, I know.  If you're having some trouble, here are 10 ideas that I have handpicked for anyone who loves homemade soda.

1. The Artisan Soda Workshop by Andrea Lynn

This little book would make a great stocking stuffer.  For anyone who is into natural ingredients and artisan foods, this book is a great companion.  The recipes in it were developed with the Sodastream in mind, so it's a perfect segue from the commercially available sodastream syrups to DIY prowess.  The flavors in here are really inspiring, too.  From Rhubarb Basil and Rosemary Lemonade to Tomato Water and Persimmon-Black Pepper Shrub.  


Fee Brothers has been serving mixologists since 1920 with drink mixes and flavorings.  They have an impressive lineup of syrups for beverages including Watermelon, Sour Apple, Warm Ginger, Grape, Orange, Lemon, Lime, and many more.  


3. iSi Soda Siphon
iSi has been in the soda siphon and cream whipper business for quite some time.  If you want to go vintage, there are glass syphons with mesh from other manufacturers, but iSi offers a brushed aluminum that will hold up to some wear and is more economical, but still has the vintage feel.  Andrew Schloss recommends these in his book as an easy way for quick force carbonated soda.
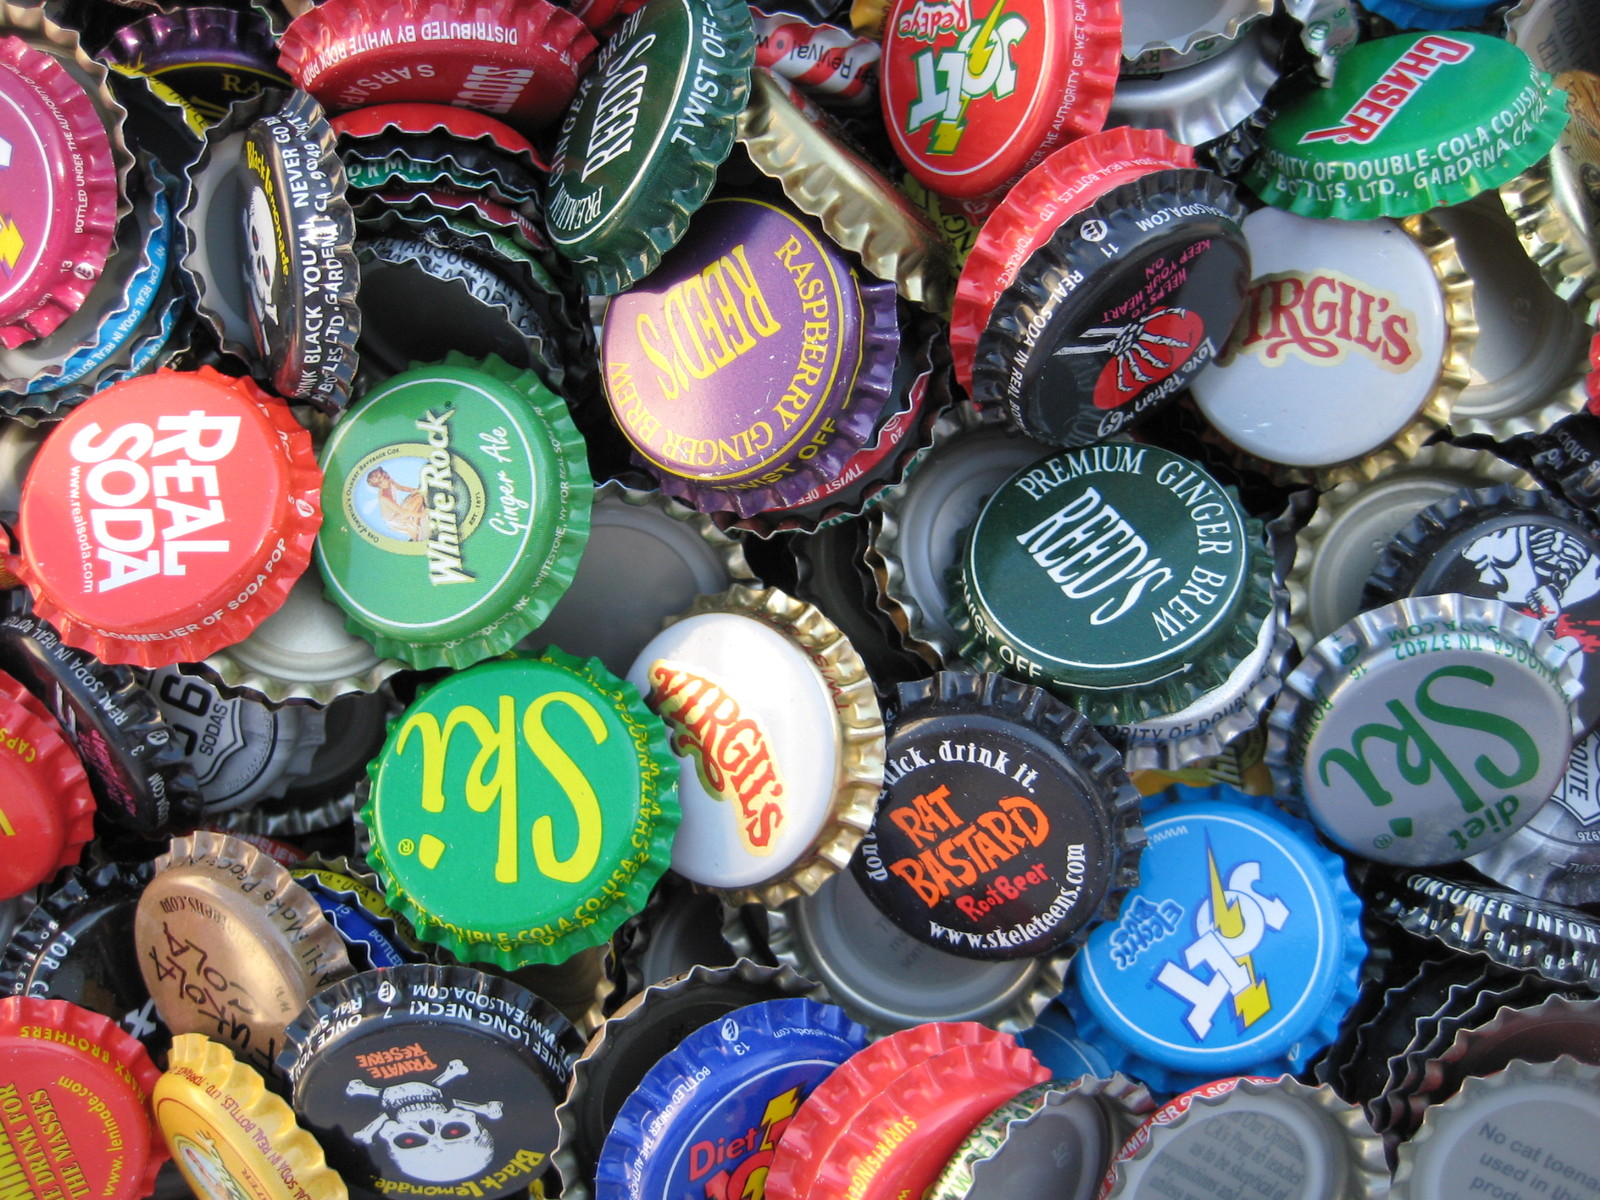
Bottling in glass bottles is fun.  There's something nostalgic about it.  You can make that experience even more nostalgic with overrun caps.  A plain cap is inexpensive, but lacks character.  This seller on ebay has the best variety of new, unused bottle caps.  You don't have to worry about getting ancient caps that may or may not seal, and you get a great assortment to avoid the mundane.

5. Vintage Soda Crates
If you are bottling in glass bottles, that means that you're storing glass bottles somewhere.  Under the stairs, in the closet, in milk crates, in cardboard boxes.  Vintage soda crates usually run about $25 each depending on where you find them.  This seller on ebay has good feedback and a wide selection.  Check flea markets, craigslist, and antique stores in your area if you want to buy local.  Sometimes garage sales have them for a great price, too.

6. Homebrew Kit
Go old school with a homebrew soda equipment kit from Midwest Supplies.  The process is simple: boil and strain your roots (or easier yet, use an extract), add sugar, pitch the yeast, bottle, and wait.  The process is made easier with a bottling bucket and bottle filler.  

7.Mr. Root Beer or Copernicus Kit.

If you want to go old school, but don't want the big batch kit from Midwest, try an all inclusive kit from Mr. Root Beer or Copernicus.  Kits include everything you need to make a yeast brewed batch of soda.  Pretty much you just add water.  The Mr. Root Beer Kit even includes bottles.


8. Roots and Herbs
Starwest Botanicals is one of the top finds for bulk herbs and spices.  They have a wide selection that includes common root beer and cola ingredients such as sarsaparilla root, sassafras root bark, burdock root, dandelion root, star anise, vanilla beans, and many more.  When using herbs and roots, it's always advisable that these were originally used for medicinal purposes, so it's important to know what these herbs were used for to avoid any unwanted side effects.

9. Fix the Pumps by Darcy O'Neil
From mixologist Darcy O'Neil, author of the Art of Drink blog, Fix the Pumps tells the history of the soda fountain and includes old time formulations using their original ingredients.  A must have history lesson for any soda maker.

Gnome specializes in old fashioned flavors and comes highly recommended.  Available in Crystal Clear Vanilla Cream Soda, Dark Vanilla Cream Soda, Draft Style Root Beer, Autumn Red Birch Beer, and Spicy Ginger Beer.  Add your favorite sweetener to taste and carbonate naturally or under pressure.  Their home page has instructions and sugar equivalents, but these must be purchased through other retailers such as CHI, Midwest, Northern Brewer and other homebrew supply stores.


November 9, 2012

Recipe 21 - Paris Lemon Mint Cooler Soda

This is a recipe that my sister asked me to make up for her wedding.  The idea came from something she had on her trip to Europe.  I think it was basically a sprig of mint leaves and a lemon wedge in ice water, but as I was putting this together for her reception, I thought it would be better sweetened and carbonated.  It worked out very well and I received many compliments on it.  It was such a whirlwind that I personally didn’t get any great pictures of it, but it was a great presentation.  The pictures here are courtesy of their photographer Katie.  The syrup I made was mixed into carafes with club soda.  There was a sprig of mint leaves in some, and raspberries in some others.  The raspberries added a touch of color and some great flavor that mixed in very well with the lemon and the mint. 


I also recently made this and bottled it for a cookout with friends and my kids loved it.  I thought the mint made it more of a sophisticated flavor, but I apparently couldn’t keep this around long enough for many adults to try it.  Imagine that.

1/2 cup Lemon Juice
1/2 tsp Mint Extract
1 lb sugar


This recipe is incredibly simple, but is also incredibly tasty.  Prepare your basic sugar syrup, many longtime readers know I prefer to invert mine.  If you plan on bottling this beverage to store for a while, add the lemon juice when the mixture is still hot to kill off any wild yeasts that might be in the juice.  You don’t want to boil the lemon juice with the sugar, though, or else you will destroy most of the citric acid.  If you’re planning on keeping your final beverage refrigerated or consuming this rather quickly, you can wait for the sugar to cool before adding the juice.  You definitely want to wait for it to cool before adding the mint flavor, the menthol that give mint it’s characteristic flavor boils off quickly, so you’ll end up losing some of the flavor if your sugar is too hot.  (And if you do happen to add it while your sugar is too hot, be sure your face isn’t right over the pot, menthol burns your eyes.)

This is enough syrup for 1 gallon of finished beverage, though the nature of this beverage also lends itself well to more subtle flavors.  So depending on your tastes, you may end up with enough syrup for 1.5-2 gallons finished beverage if you like your flavors and sweetness on this one a little more subdued.

November 1, 2012

Happy Halloween!

Tony Stark, the Homemade Soda Expert.
Happy Halloween everyone!  I've decided that I would go ahead and break my own unwritten rule of remaining anonymous and faceless here on my blog.  I needed to show off something that I built in a cave with a box of scraps.  Of course by cave, I mean on my living room coffee table, and by box of scraps, I mean a box and some other stuff I had lying around but not necessarily in the box.  But because Trick-or-Treating was postponed in our neighborhood due to weather, I at least needed to awe someone with my glowing chest piece.

I promise I do have a head above my eyes, and I'm not sure how that pumpkin photobombed my picture.  Actually, this was a photo for a contest.  Which is why I'm here today.  Midwest Supplies is hosting their annual Boo Brew giveaway, and who couldn't use some extra supplies to build up their recipe repertoire?  If you like my blog, and you like what I do here, and you would like to see more.  You can do your part to make this blog better by voting for my picture on their Facebook promotion Here.  Voting is open until 11/7.

Thanks for your support!  Now go make some soda!

October 20, 2012

Recipe 20 - Pumpkin Pie Syrup for Soda and Everything Else

Another write-up for my longtime friends over at Everyday Art
I want to offer a special thank you to them for letting me be a part of their Pumpkinpalooza!


Let me just say that fall is a particularly favorite time of year for me.  October is a good month.  It's time for harvest celebrations, apple cider with glazed donuts, Halloween, and of course all things pumpkin.  Sometimes I wish that everything could taste like pumpkin pie.  Jones Soda did place doubts into my mind with their Pumpkin Pie soda in one of their holiday packs (really Jones, you could have tried harder).  At the first taste of their not so pumpkin pie soda, I knew there had to be a better way.  After many failures in years past to produce a suitable pumpkin pie soda, (it turns out a little pumpkin goes a long way) this is actually a tasty recipe that by far makes all those failures worth the effort.

You'll Need:
1 1/4 cup water
1 cup sugar
1/4 tsp cloves
1/4 tsp ginger
1/2 tsp cinnamon
1/2 tsp nutmeg
2-3 Tbsp Pumpkin Puree (fresh or from the can)

1. In a small sauce pan, combine the 1 cup of the water and all four spices.
2. Cover and bring to a simmer for about 5 min.
3. Allow to cool, then strain through a fine mesh sieve or suitable strainer to remove the ground spice.  You should have plenty of good spice flavor infused into the water.
4. Top up your spice infused water to 1 cup (I used the remaining 1/4 cup) and combine in the saucepan (rinsed of all spice granules) with the sugar.
5. Heat to dissolve the sugar, this may take it to a simmer again.
6. Remove from heat and add pumpkin puree.
7. Allow to cool and add to soda, oatmeal, pancakes, waffles, french toast, hot chocolate, cream cheese, egg nog, or whatever.

For soda:
To 2 Tbsp syrup, add 8-10 oz of Club Soda or to taste.  Carefully stir and enjoy.  With this recipe, there will be pulp from the pumpkin, so a finished soda doesn't bottle and store well.  I've tried to keep the particulates at a reasonable level by filtering out the spice.  You can leave the spice unfiltered if you wish for using this recipe in things like cream cheese, ice cream, pancakes, hot chocolate, egg nog or anything where you might expect spice to linger.  For a thinner body beverage like soda, it's best to leave the spice granules out, but keep the flavor in.

This is a great Soda Stream recipe because it lends itself well to smaller batches: the pulp settles out if it sits, and if your house is like mine, not everyone likes pumpkin pie flavor, particularly in a soda.  The syrup keeps for up to three weeks in the refrigerator, but it's good enough that it probably won't be around that long.

October 17, 2012

Recipe 19 - Lemon Water Soda (Homemade Sprite)

When I was a kid, I never believed the Sprite commercials when they said that it was supposed to be a lemon-lime flavor.  They did almost have me fooled into thinking that there was such thing as a "lymon", though.
I always thought that Sprite, 7-up, and other lemon-lime clones were sort of flavorless.  They were sweet, they were clean, they were refreshing, but they weren't distinctly lemon or lime.  Then one day as a child I tasted club soda and it brought everything into context.

Snap to 25 years later, and here's my take on the clear citrus beverage.  Sweetened, carbonated, lemon-water.  I do enjoy a lemon in my water from time to time, and I thought it would be a good match to other green-bottled clear citrus sodas.  It is perhaps the simplest soda next to plain club soda (carbonated water).
You'll Need:

1 Lemon
1 lb sugar
1 tsp Citric Acid , or additional 2 tbsp lemon juice
1 gallon (4 L) carbonated water

The great thing about this is that you can add as much syrup to your carbonated water or as little as you want and it will always taste great (well, within reason).  What I've outlined here is a pretty decent match to the commercial versions, but without the lime.

First, zest the lemon and steep the zest in about 1 cup of water.  You should get a pretty good yellow color, with it, too.  Unfortunately, this doesn't necessarily show up in the finished product.

Next, Strain out your lemon zest/peel, and add your sugar directly to the water that you've used to steep the lemon in.  I normally invert my sugar to get more sweetness out of it, but this comes out nicely without the inversion.  Using pure cane sugar comes out a little clearer, and a little less syrupy, but you do end up with the same amount of calories for less sweetness for those making their own soda for health reasons.  You can obviously always use less sugar for a less sweet drink, also.

To top it off, you'll need to add some tartness.  Again, you can add as much or as little as you'd like depending on your tastes.   For a crisp, clean drink, Citric Acid can be found online or at some health food or specialty food stores.  If you prefer, you can use Lemon or Lime juice, as they are great sources for citric acid, but you will need to add more, and they will add more lemon/lime flavor and some cloudiness.

Add this syrup to your carbonated water and there you have it.  This makes syrup for about 1 gallon of finished beverage depending on how sweet or lemony you want to end up with.

October 1, 2012

Recipe 18 - Chocolate Cream Soda

It dawned on me the other day as I was going through my stats that I posted 13 recipes last year.  So far this year I have posted a total of four, three of which were listed under "quick-kegging recipes" and were abbreviated versions of previous posts.  That makes me feel like a slacker.  Granted, there's been a lot going on in my life in the past few months, but there's no excuse for not getting those recipes out. 
I've been making soda, there's no doubt about that.  I just haven't been chronicling it well.

I had mentioned in my earlier chocolate soda recipe that I didn't think it was finished.  Though, I didn't fully realize my goals that I set out to achieve when I first attempted chocolate soda, (not from extracts, doesn't taste like a tootsie roll) I have come up with a bit of a compromise.  The secrets to this recipe are the cocoa nibs and the imitation chocolate flavoring.  Cocoa nibs because they can be steeped for a natural flavor and they add a little complexity to the overall flavor without being cocoa powder to settle out or clog filters, and chocolate extract because it's easy, boosts the flavor, and provides a little coloring as well.  Watkins is the only readily available chocolate flavoring that I've seen, the link below is from Amazon, if you can't find it at your local Walmart.

Unfortunately, I didn't quite meet my previous goals: the recipe does contain an artificial extract (not that I really have anything against artificial flavors, but because it makes me feel like a bit of a cheaty-face), and if you're not careful, it ends up tasting fake like a tootsie-roll. 


-1 lb sugar (inverted)
-1tsp cocoa nibs
Steeped Cocoa Nibs
-1tbsp Watkins Imitation Chocolate Flavor (also available at Walmart)
-1 1/2 tbsp Vanilla Extract

Steep the cocoa nibs in about a cup of water.  You can steep more, and use less artificial extract, but that ends up being kind of pricey.  I have wondered what would happen if you ran these through a coffee maker.  I don't own one, so I haven't had the chance to try it.  Fair warning, it doesn't look all that pretty:

Filter out the nibs, then add your inverted sugar syrup and your extracts.  BAM! Chocolate soda syrup for use with 1 gallon of carbonated water.  This would be a great Sodastream recipe, or you may get some extra flavor out of the traditional method of fermenting this with champagne yeast.  I think that would be worth a try, but leave the cocoa nibs in to pull out more flavor.

Easy Bottle Sealing Wax

I put this tutorial together for my crafty friends over at Everyday Art.  They've got some good things going on over there.

For Christmas last year, I put these vintage looking bottles of homemade soda together to give as gifts.  They don't necessarily have to have a Christmas theme to them.  This is not necessarily an original idea, either.  Homebrewers have done this for a while, but I thought my version looked pretty classy so I thought I would share.  The labels were just laser printed on normal paper, the ribbon was just basic ribbon from a craft store, and the sealing wax is actually a blend of hot glue and crayons. 

Sure, you could just buy some bottle sealing wax at a wine supply shop, but if you have kids, there seems to be an endless supply of random crayon fragments collecting in Ziploc bags somewhere.  Do you know what that means?  That means you can make sealing wax virtually any color you want! (Well, depending on what crayons you have on hand, anyway.)

So first, collect your crayons and determine what color you want.  You'll need the equivalent of about 3 full size crayons per 5 equally sized glue sticks.  A ratio of about 12:20 is a good sized batch to cover about 4 dozen bottles (a little less than a 5 gallon batch of beverage using 12 oz bottles.)  You can adjust your ratio as you go depending on how brittle or plastic you want your seal to be.  To test, your consistency, just drip some into cold water and attempt to break or crumble it.  More glue makes a more plastic final product, more crayons makes for a more brittle/crumbly final product.  This is also a great time to get rid of those pesky white crayons that rarely get used.  My 2-year old son actually brought me a white crayon saying it was "broken" because it didn't "color" on white paper.  The white crayons will add the same brittleness, without affecting the color much.  They will lighten your final color, but not nearly as much as I expected.  You can also use uncolored paraffin to equal effect, but I'd wager there's more unused crayons laying around your house than unused paraffin.

Now you'll need to prep your bottles.  The labels were applied earlier using an age-old, secret glue: milk.  It holds well and cleans up easily, and there's not enough there to stink or get nasty, it just dries out.  Rub a thin layer on with your finger, just enough to get it wet, then apply the label to the bottle and press out any bubbles with an absorbent cloth for a nice clean look.  For this reason, using a laser printer instead of an inkjet printer is highly advised so the colors don't run.  If you have any loose corners, you can reapply the milk to get it to stick down.


Now, with a heavy layer of wax, it can be tough to get a bottle opener to bite through the wax around the cap.  I used some ribbon as a pull tab to peel away the wax to get the bottle open.  It was difficult to get the ribbons to stay in place, so I put a little dab of hot glue on there to keep them in place while I dipped them.  I also put a little dab above the label to keep the ribbon in place where the seal stamp will go later. 

It's time to melt your wax.  A soup can on the stove over low heat makes a perfect melting/dipping pot.  I've seen others use a double boiler to melt their wax, but I don't want to stick my hand over boiling water if I don't have too.  If you're doing this with kids, a paper cup in the microwave can be used instead, but it will probably need reheated between bottles.  You could use an unwanted saucepan as a melting pot, but the wider your pot, the more wax you'll need to get the wax deep enough to dip into.  Whether in the microwave or on the stove, melt everything together and stir it with a craft stick to a nice even consistency.

Once melted, go right ahead and dip the tops of the bottles right into the wax.  You can either let it drip down the sides, or you could make a nice smooth edge by rolling or twisting the bottle as you bring it out.  I personally think a few drips look good, but too many look sloppy.  If you want to speed things along, have some cold water to dip into to set the wax faster.  I found a second dip covered the crimps in the cap so it looked a little cleaner.  I also found that tipping the can on it's side helps if you don't have a very deep pool of wax.  Dip the bottle in and roll it around for a bit.  You can see I was cautious and used an oven mitt, but in reality, if the can is too hot to touch, you're probably overheating your wax. I touched it afterward with my fingers and I could handle it comfortably.

For the stamp, using a craft stick, dip into the wax and drip some onto the face of the bottle.  Before it cools, press your stamp into it.  You can use anything from a real sealing wax stamp, to a coin or fancy button, to a plain rubber stamp.  I used a 1978 Aluminum Maltese Mil coin, basically worth a tenth of a cent, these went out of circulation years before I picked it up for obvious reasons.  The scalloped edge and very noble looking cross of St. John (a.k.a. Maltese Cross) gave it a nice classy flair.  Because I prefer my stamp to have a handle for ease of use, I took a gluestick, heated the end and pressed it straight onto the other face of the coin.  I sort of regret doing this, as I can't seem to get it off now.  But I have to keep asking myself what else I would use a Maltese Mil for anyway.  To ensure that your stamp doesn't get stuck into the sealing wax, keep the face of it in a shallow bowl of cold water, or the surface of an ice cube.  The cold will quickly set the wax, and the water will in a sense "lubricate" it to prevent adhesion.


And there you have it.  A sealed bottle.  This would be a great project for gifting homemade beverages, for empty decorative pieces, or even a message-in-a-bottle for a party invite or prom-posal.  If you're not sealing in a beverage, you don't necessarily have to cap it, basic corks will seal over nicely. If you're looking for a decorative piece, even a screw top bottle will work.  Decorative bottles are typically found at craft stores, sometimes restaurants will save wine bottles for you (some will not due to sanitary considerations), or you can buy new ones from homebrew or wine supply stores.
Related Posts Plugin for WordPress, Blogger...